soothe2 user manual
- 1. Introduction
- 2. Quick start
- 3. Parameters
- 3.1. Main section
- 3.2. Stereo section
- 3.3. Speed section
- 3.4. Quality section
- 3.5. Sidechain
- 3.6. Output section
- 4. Frequency and reduction graph
- 4.1. Band types
- 4.2. Band controls
- 4.3. General features for all EQ nodes
- 4.4. Other features of the graph
- 5. Toolbar
- 5.1. Preset menu
- 5.2. Undo/redo
- 5.3. Comparing settings with A/B switching
- 5.4. Help menu
- 5.5. Configuration menu
- 6. Miscellaneous
- 6.1. Input trim
- 6.2. Version update checks
- 7. Paths for presets and uninstallation
- 7.1. macOS
- 7.2. Windows
- FAQ and support
- Appendix: Diagram of the processing pipeline
1. Introduction
Soothe2 is a dynamic resonance suppressor. It works by analyzing the incoming signal for resonances and applies reduction automatically. Soothe can be used on individual channels, busses, and in mastering.
It is recommended that you read through the manual to understand all the details around Soothe. Alternatively, you can use the interactive tutorials in the plug-in or this quick-start tip if you want to get right to it:
2. Quick start
- Start with the default factory preset and turn the depth up until you notice that Soothe attenuating too much. Then, back off the depth setting slightly.
- Adjust sharpness to suit the input material – less sharpness for more general processing and more sharpness for targeting more specific resonances.
- Press delta to turn on delta monitoring feature.
- Use the nodes on the frequency graph to focus the processing. Boost a frequency area until you hear the resonances you want to take out.
- Turn off delta monitoring and find an optimal depth value.
- Use bypass to evaluate the result of the processing.
3. Parameters
3.1. Main section
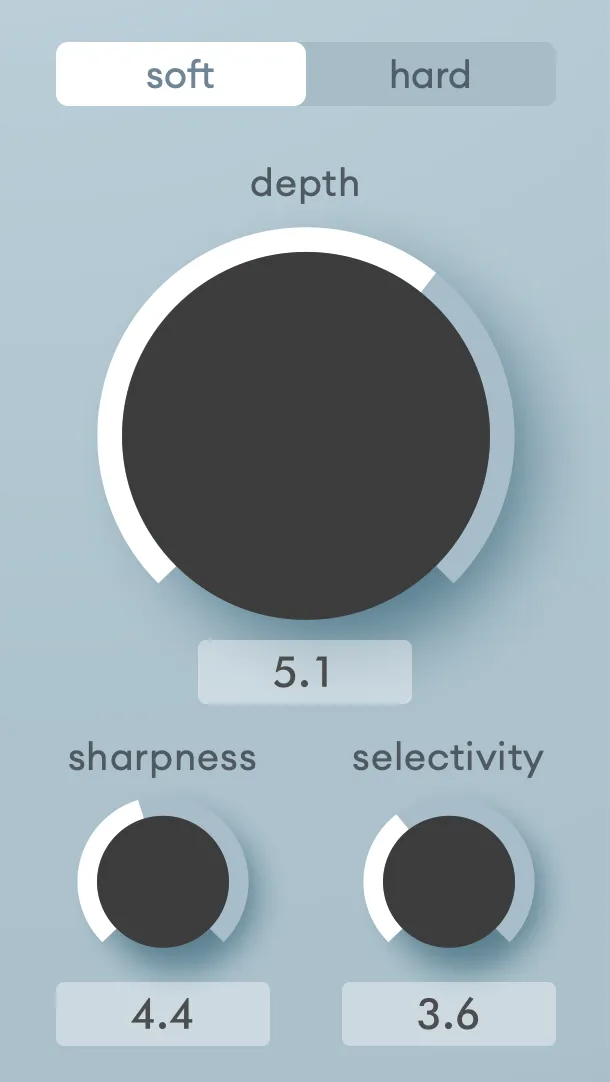
Soft/hard mode
Soothe defaults to soft mode, which is usually easier to use and faster to set up. It is more transparent, preserves transients better, and generally causes fewer artifacts. The soft mode is less level-dependent and is often better suited for tracks with a wide dynamic range.
Hard mode is more level-dependent, powerful, and tweakable. It can be easier to overuse and may take more time to set up, but it can be necessary for material with prominent resonances. For example, when soothing a close mic’d guitar cabinet, the soft mode might not produce adequate results. In those cases, using the hard mode is a good option.
Note: Selecting a mode changes the behavior of the parameters and is relative to the mode. I.e., a depth of 3.0 in soft mode will not behave like a depth of 3.0 in hard mode.
Depth
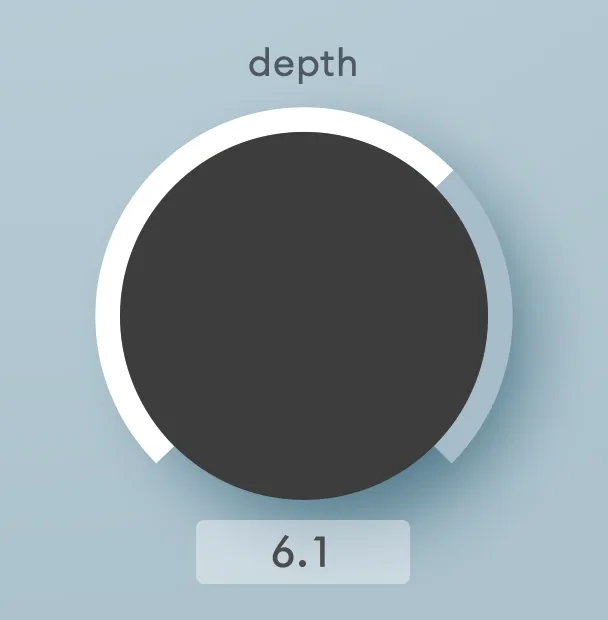
Depth controls how much processing is applied to the signal: more depth results in more reduction. You can think of it as the sensitivity or threshold for the processing. Adjust the depth always according to the input signal, even when using presets.
The numeric depth value does not represent the absolute amount of reduction in dB, which is shown in the frequency graph.
Depth has more range than what is usually needed. This is to open up possibilities for creative uses. Cranking the depth all the way up can result in up to 60 dB notches that will mangle the sound source beyond recognition.
Sharpness
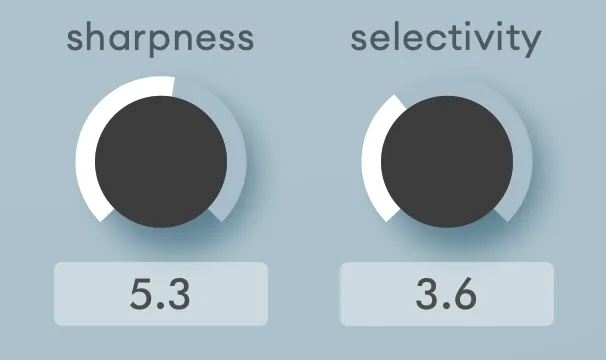
Sharpness controls how deep and narrow cuts Soothe makes. Higher sharpness results in deeper and narrower cuts. High sharpness values can be beneficial for sharp resonant audio material like drum overheads. Low sharpness values can be good for addressing general energy build-ups both in individual instrument channels, busses and master channels.
If a high sharpness in soft mode doesn’t reduce the resonances enough, you can try lowering the sharpness and switching to hard mode. Note that an overly high sharpness can introduce unwanted artifacts, making the signal sound distorted. The resulting distortion is noise, and non-resonant residue in the sound material as the process removes all the resonant frequencies in a very surgical manner.
Selectivity
Selectivity determines how selective Soothe is about what resonances to suppress. Selectivity acts as a threshold. With a higher selectivity value, only the most prominent resonances are cut. This is a good setting for targeting specific spot frequencies in instruments such as string and wind instruments. A lower selectivity value means, Soothe is less selective and cuts almost all resonances. This is a great way to make the uneven material sound more balanced.
For de-essing, the optimal selectivity value depends on the nature of the sibilance. For noisy, more broadband esses, a lower selectivity value is recommended. A higher selectivity value may work better if the esses are more of the whistling or lisping type.
The main controls – soft/hard mode, depth, sharpness, and selectivity – are interdependent, so changing any of them might require adjusting others.
3.2. Stereo section
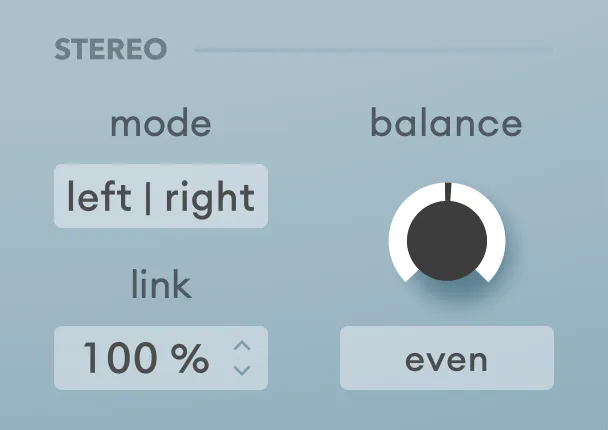
Stereo mode
Stereo mode toggles between mid/side and left/right processing. All related stereo controls follow this setting. The left/right mode with a low link setting usually works well on source material with hard-panned elements. Mid/side mode with the link at 100% is a good starting point for any complex stereo material. The stereo image typically gets wider when lowering the link setting in mid/side mode.
Stereo link
With the stereo link at 100%, Soothe will sum the channels for analysis and apply the same processing to both channels. When the link is set to 0%, Soothe will act as dual mono and process each channel individually.
Stereo balance
Adjust balance to control how much processing is applied to each channel. When you want to focus the processing on the left channel, you can turn the balance rotary to the left. The text box below shows 100% for the left side and less for the right side – and vice versa. This works equally for the mid/side stereo mode.
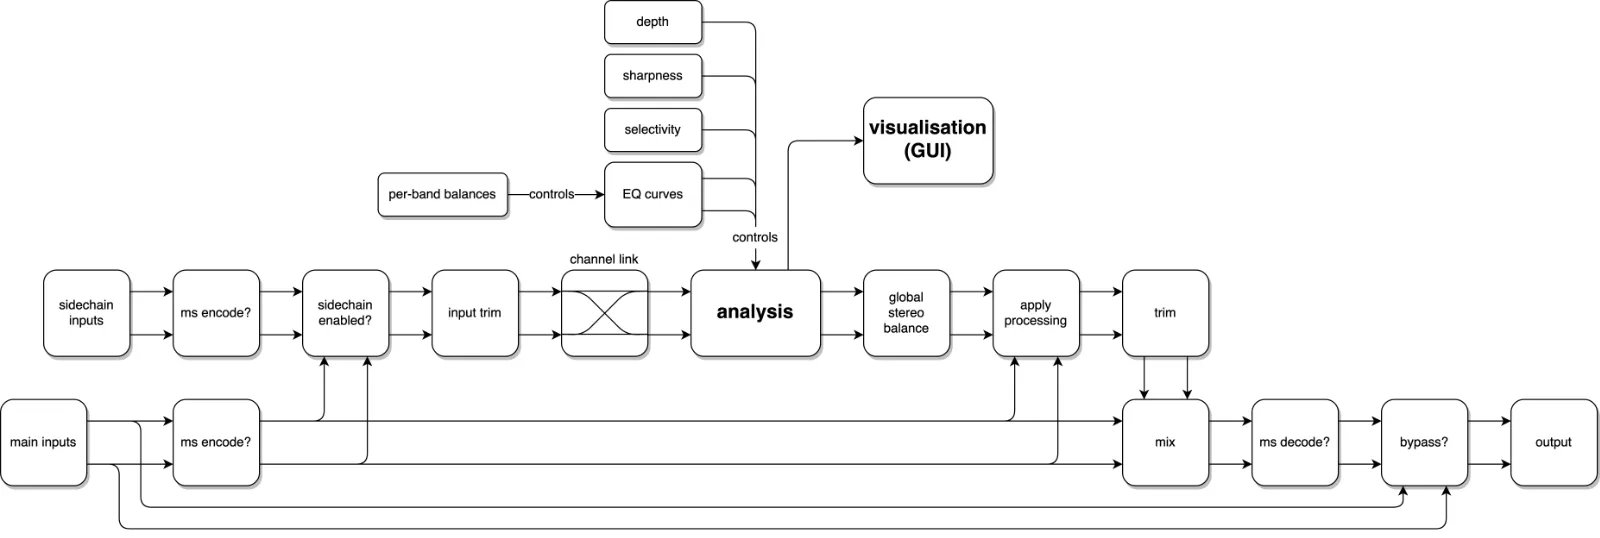
Note: For more information on different balance settings, see the diagram of the processing pipeline.
3.3. Speed section

Attack
Attack determines how quickly the processor reacts to resonances. A high attack value results in a slower response and vice versa, similar to compressors. The attack value is displayed as a referential constant, while the actual response times are frequency-dependent. The attack speed is always relatively faster on high frequencies.
Release
Release determines how quickly the notches disappear after the corresponding resonances have disappeared. Like the attack value, the release value is displayed as a constant but is frequency-dependent. Low values result in a fast release, and high values in a slow release.
Increasing the release value can be used to avoid possible processing artifacts, as fast-moving, adapting filters can create audible phase distortion when doing drastic cuts.
3.4. Quality section

You can increase spectral oversampling and time resolution in the quality section. The left-hand side value refers to the selected real-time oversample value, and the right-hand side value to the selected real-time resolution value.
The asterisk (*) indicates that the offline settings differ from the real-time settings. Open the quality controls by clicking the selected quality settings’ label.
Oversample
Oversample calculates the reduction filter in a higher frequency resolution. Higher values offer better frequency resolution for the processor to distinguish resonances. This can be necessary when working with low frequencies. Higher oversample settings give you smoother results when using high sharpness values.
Resolution
Resolution adjusts the resonance detection’s refresh rate and filter updates, resulting in a smoother response in the time domain. Using resolution in high or ultra can be beneficial with material that has lots of transients or complex waveforms, such as drums, busses, harpsichord, or grand piano. Using resolution on eco roughly halves the CPU usage. However, this can introduce artifacts if the material’s frequency content varies a lot over time.
Note: For both oversampling and resolution, the higher settings can be extremely demanding on the CPU!
Offline rendering quality settings
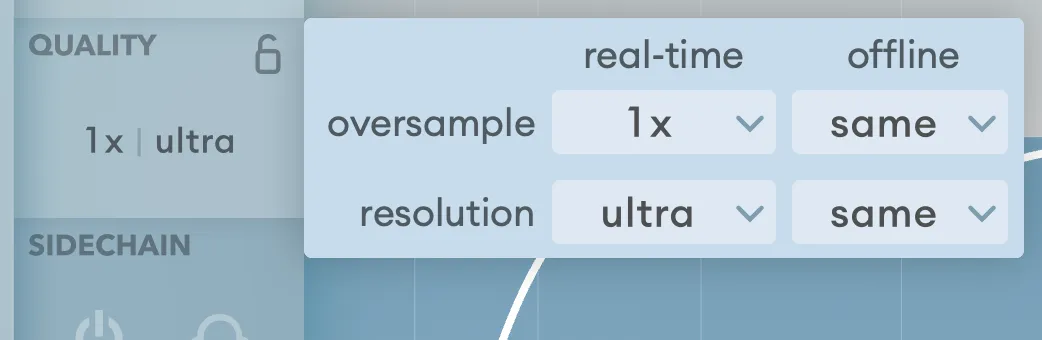
Use the dropdown menu on the right-hand side to change the offline rendering settings. These settings override the real-time settings when the plug-in host reports it’s doing an offline rendering. All major DAWs should support this functionality.
With this, you can first adjust Soothe with higher quality settings. When you’re happy with the results, you can drop the real-time rendering quality to save the CPU while bouncing at the desired quality.
The offline settings include “same as real-time (default) and “copy to all instances” in addition to the standard real-time quality settings. The first refers to using the real-time settings for offline rendering. With the latter, you can set all of the project’s Soothe instances to use the same offline settings as the current instance.
Note that offline rendering settings go together with presets. Loading a preset might change the instance’s offline rendering settings.
Lock quality settings between presets

Lock the quality settings to keep them unchanged when changing presets by toggling the lock icon. This lets you set your preferred quality settings while browsing through different presets.
3.5. Sidechain

You can route an external input into Soothe and use it for resonance detection by toggling on the sidechain. Click the headphones icon to listen to the external sidechain input. Sidechain is only in use when the on/off icon is lit. The details on routing an external sidechain key signal to a plug-in depend on the DAW you are using.
You can, for example, use a hi-hat channel as the sidechain input to a snare track to control the hi-hat bleed to the snare channel. You can also set up your session with the lead vocals going to a separate bus from the rest of the material and carve out space for the vocals by using them as the sidechain key input for the rest of the material. You can combine the sidechain settings with the mid/side stereo mode to settle vocals in the stereo image.
When the sidechain key signal is routed to Soothe, with the sidechain enabled, the reduction and visualization are based on the sidechained signal.
Sidechain input delay compensation
Soothe requires the main and sidechain inputs to arrive in sync for the sidechain to work as intended, and proper delay compensation may be necessary. The DAW handles the bus routing delay compensation.
You can find up-to-date information about per-DAW delay compensation on our website: https://oeksound.com/support/daw-delay-compensation
3.6. Output section
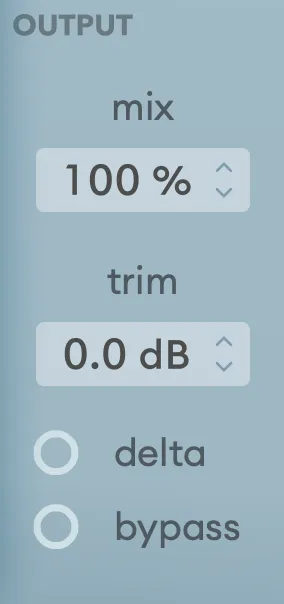
In the output section, you can adjust the monitoring and levels of Soothe.
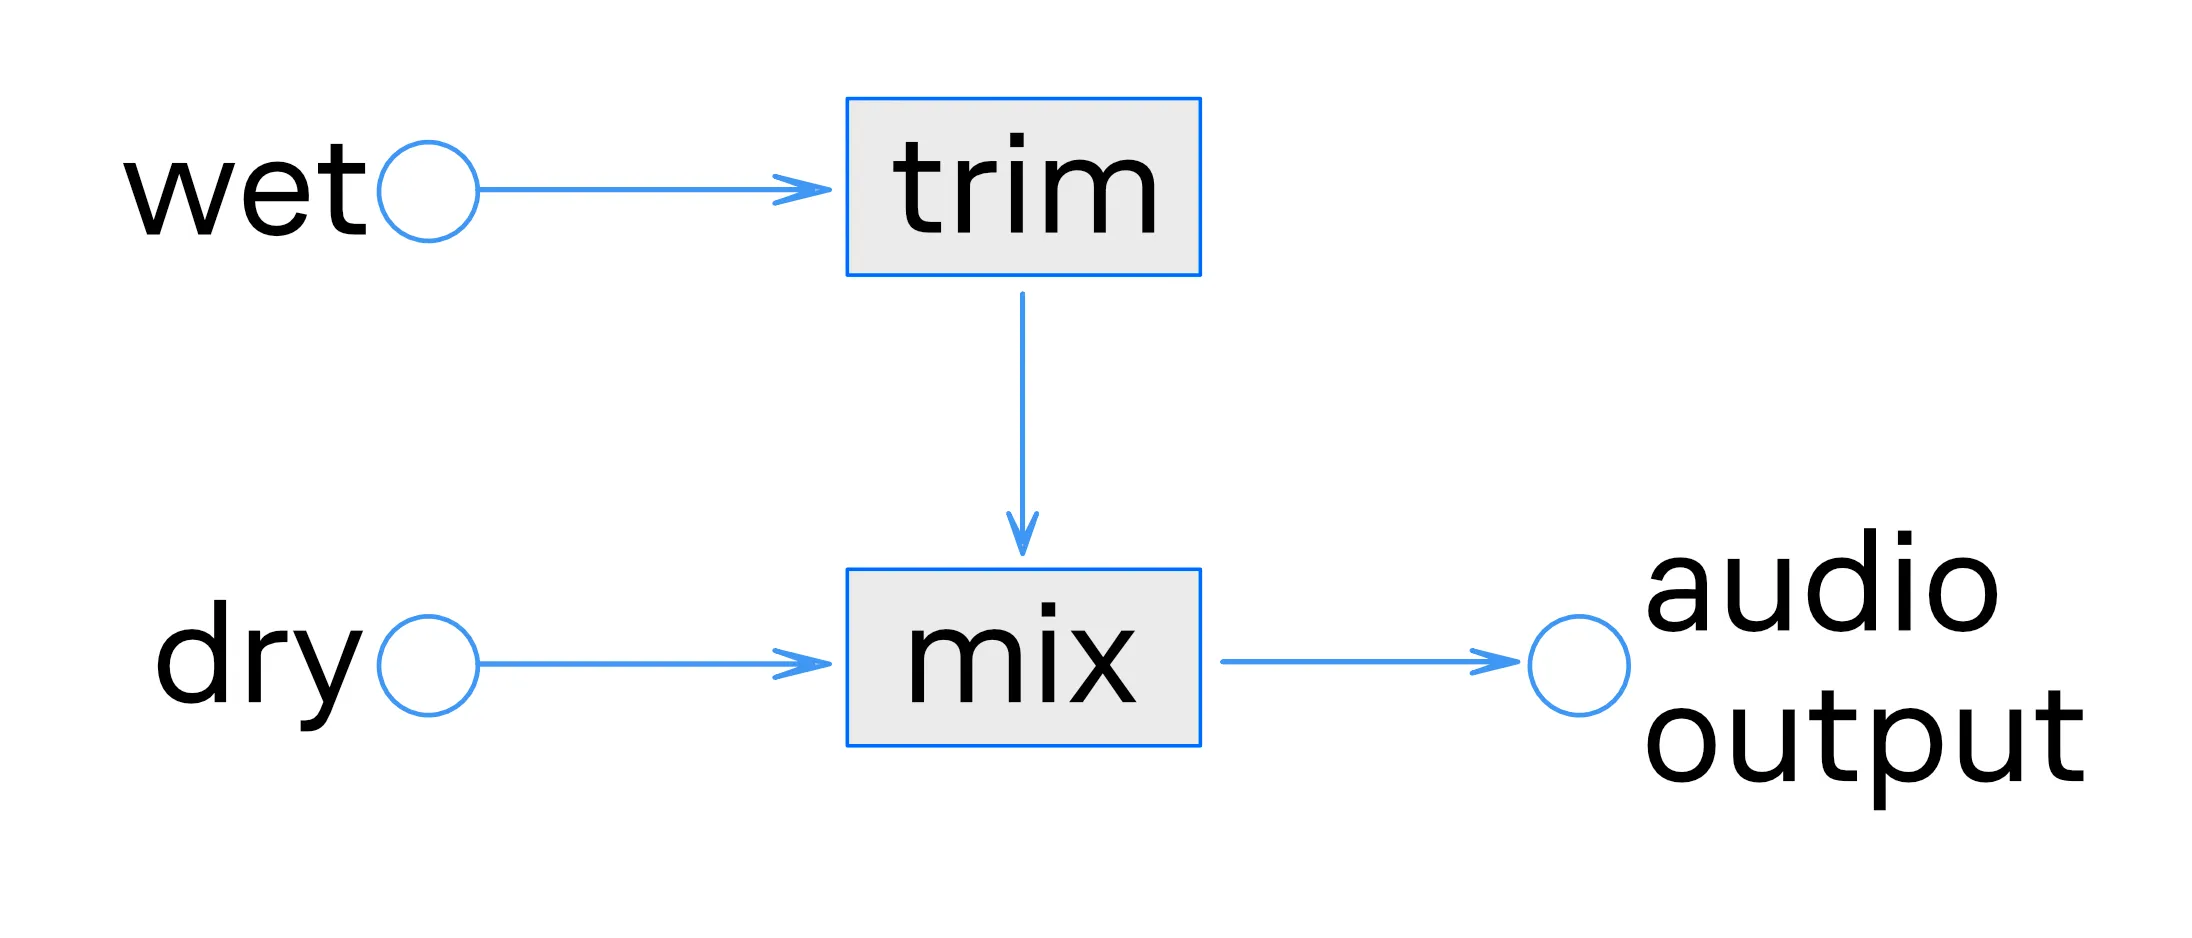
Mix
Adjust the wet-dry ratio using the mix setting. When the mix is at 100%, only the wet (processed) signal comes through the output. When at 0%, only the dry (unprocessed) signal gets to the output. You can, for example, apply heavy processing with Soothe and then mix some dry signal back in for more transparent results.
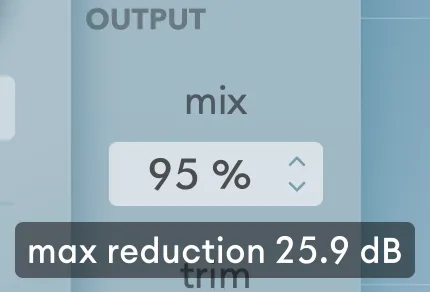
Note that the reduction graph visualizes the processed signal. Lowering the mix value will result in shallower notches in the graph. The maximum reduction in decibels is shown when adjusting the mix control or hovering over it.
Trim
Delta
Delta is the difference between the dry and wet signals. Toggle delta on to monitor the part of the signal Soothe is removing. Delta helps you understand which frequencies are affected by the current settings, much like boosting a frequency with an EQ can help you know what to cut. Delta can also be used as an effect by leaving it on.

To lock or unlock your current delta setting, right-click the delta toggle. Locking the delta setting keeps it unchanged when changing presets. You can use it to compare the delta of different presets quickly.
Bypass
Bypass is a soft bypass for quick A/B comparison without glitches that some DAWs might introduce when bypassing the plug-in from the host. Please note that Soothe continues to compute the output, so bypassing using this control won’t save you any processing power. To disable the plug-in, you should always deactivate it from the host.
4. Frequency and reduction graph
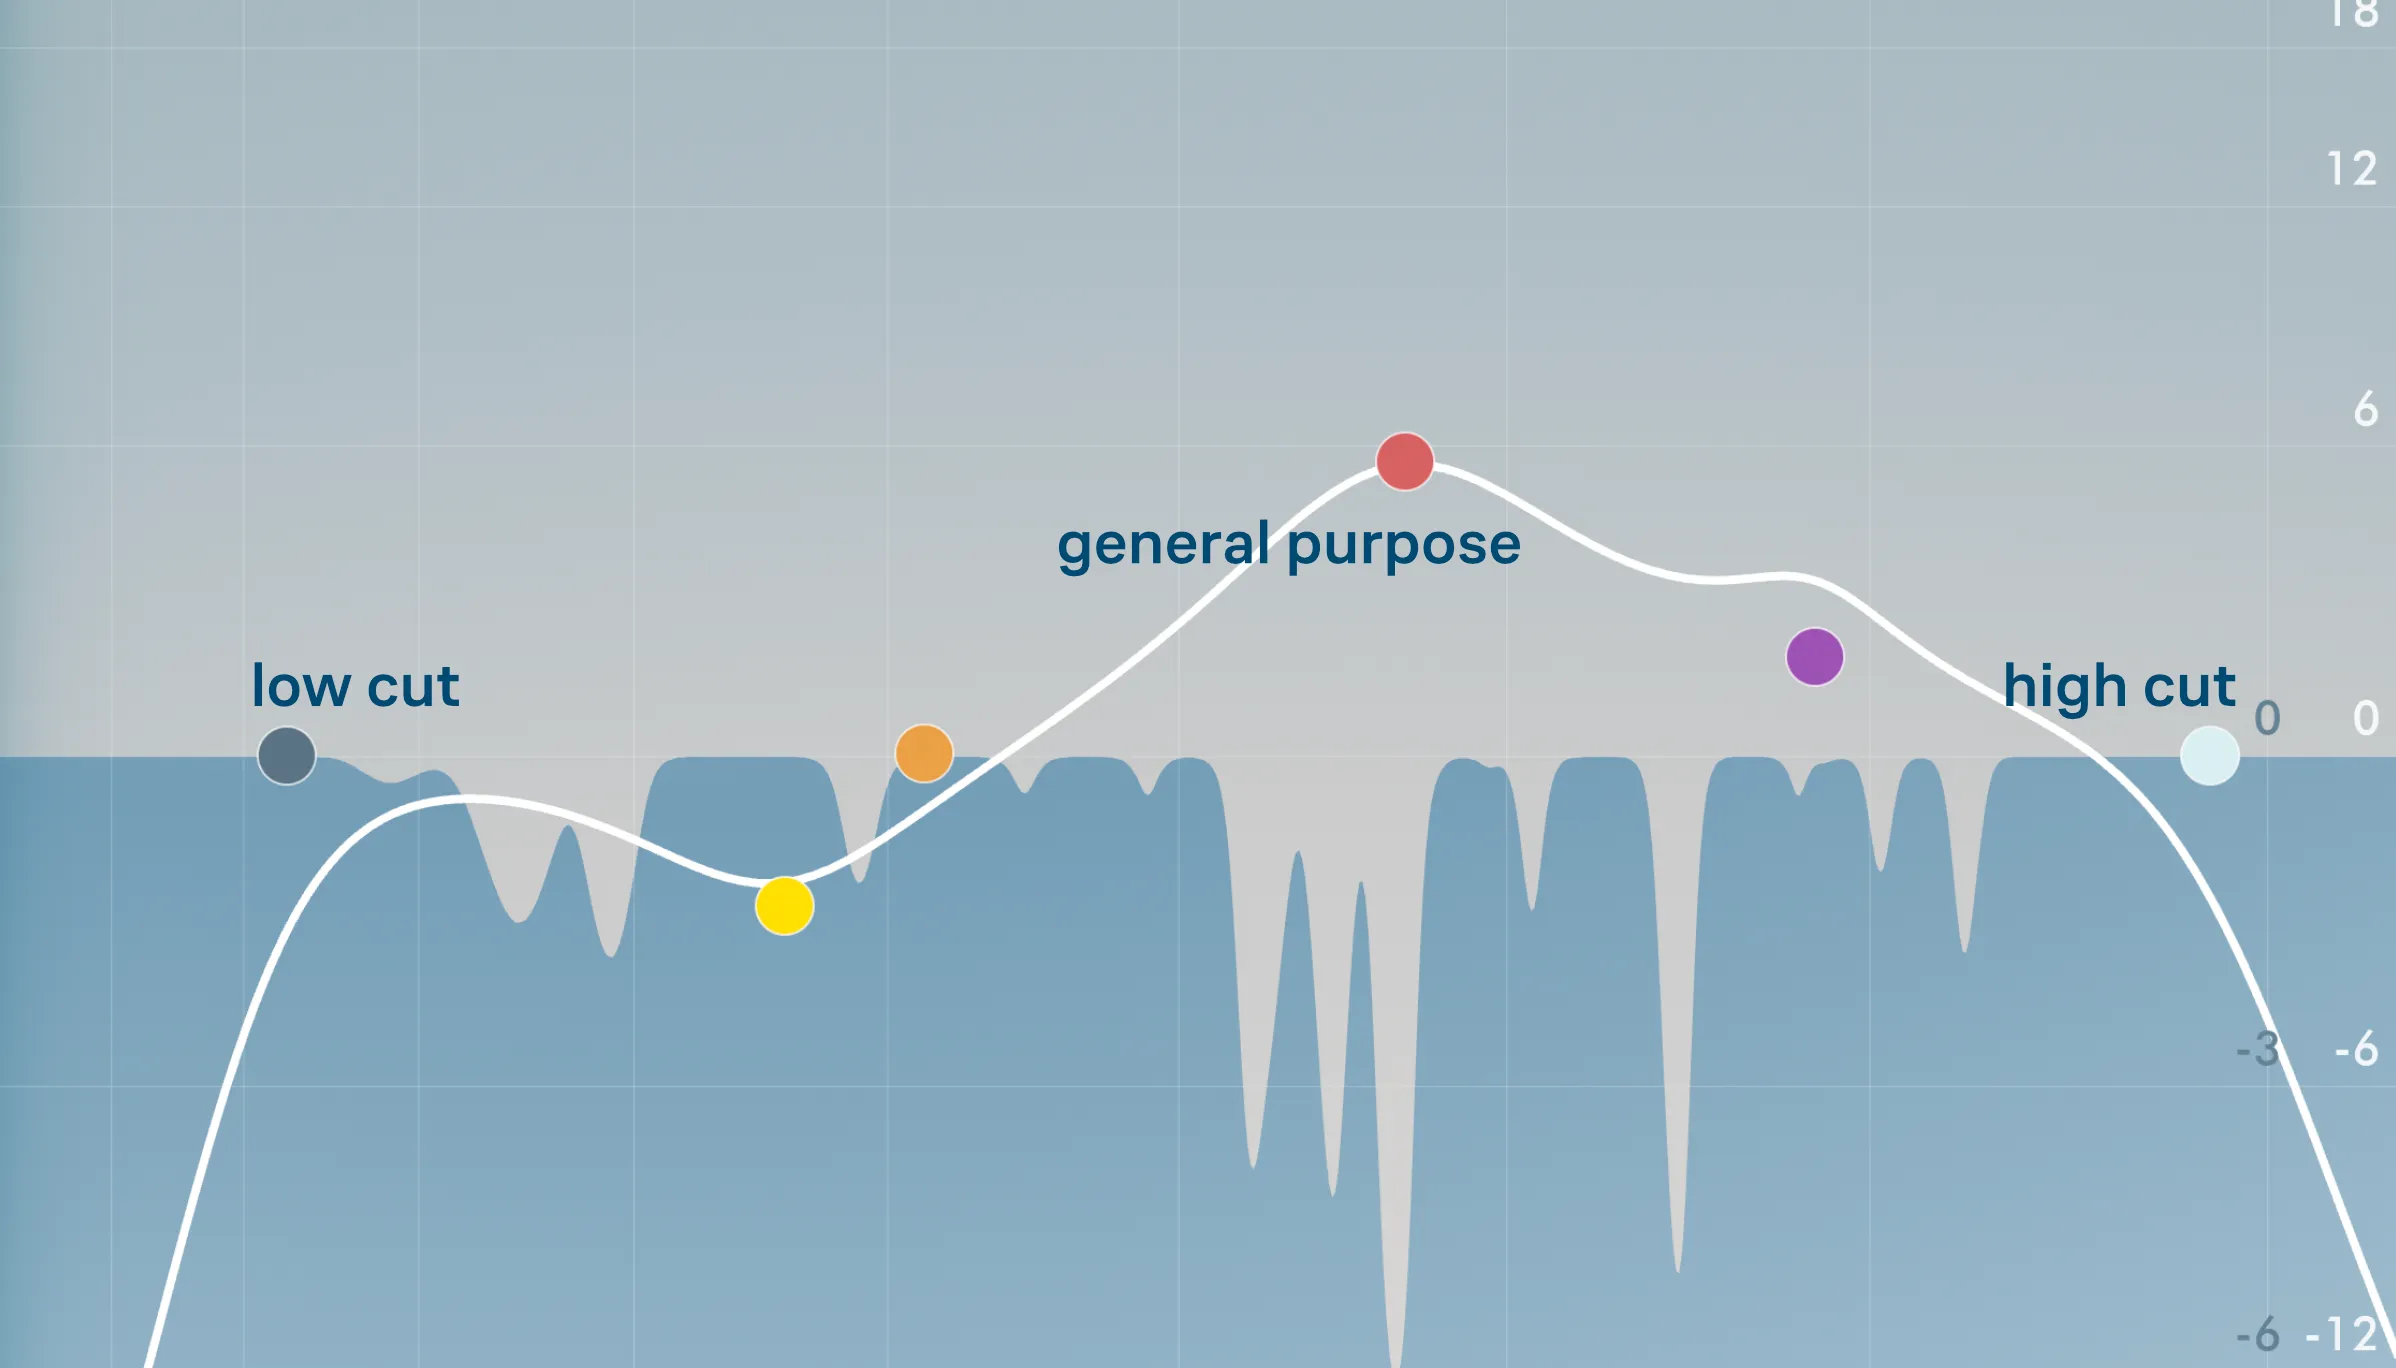
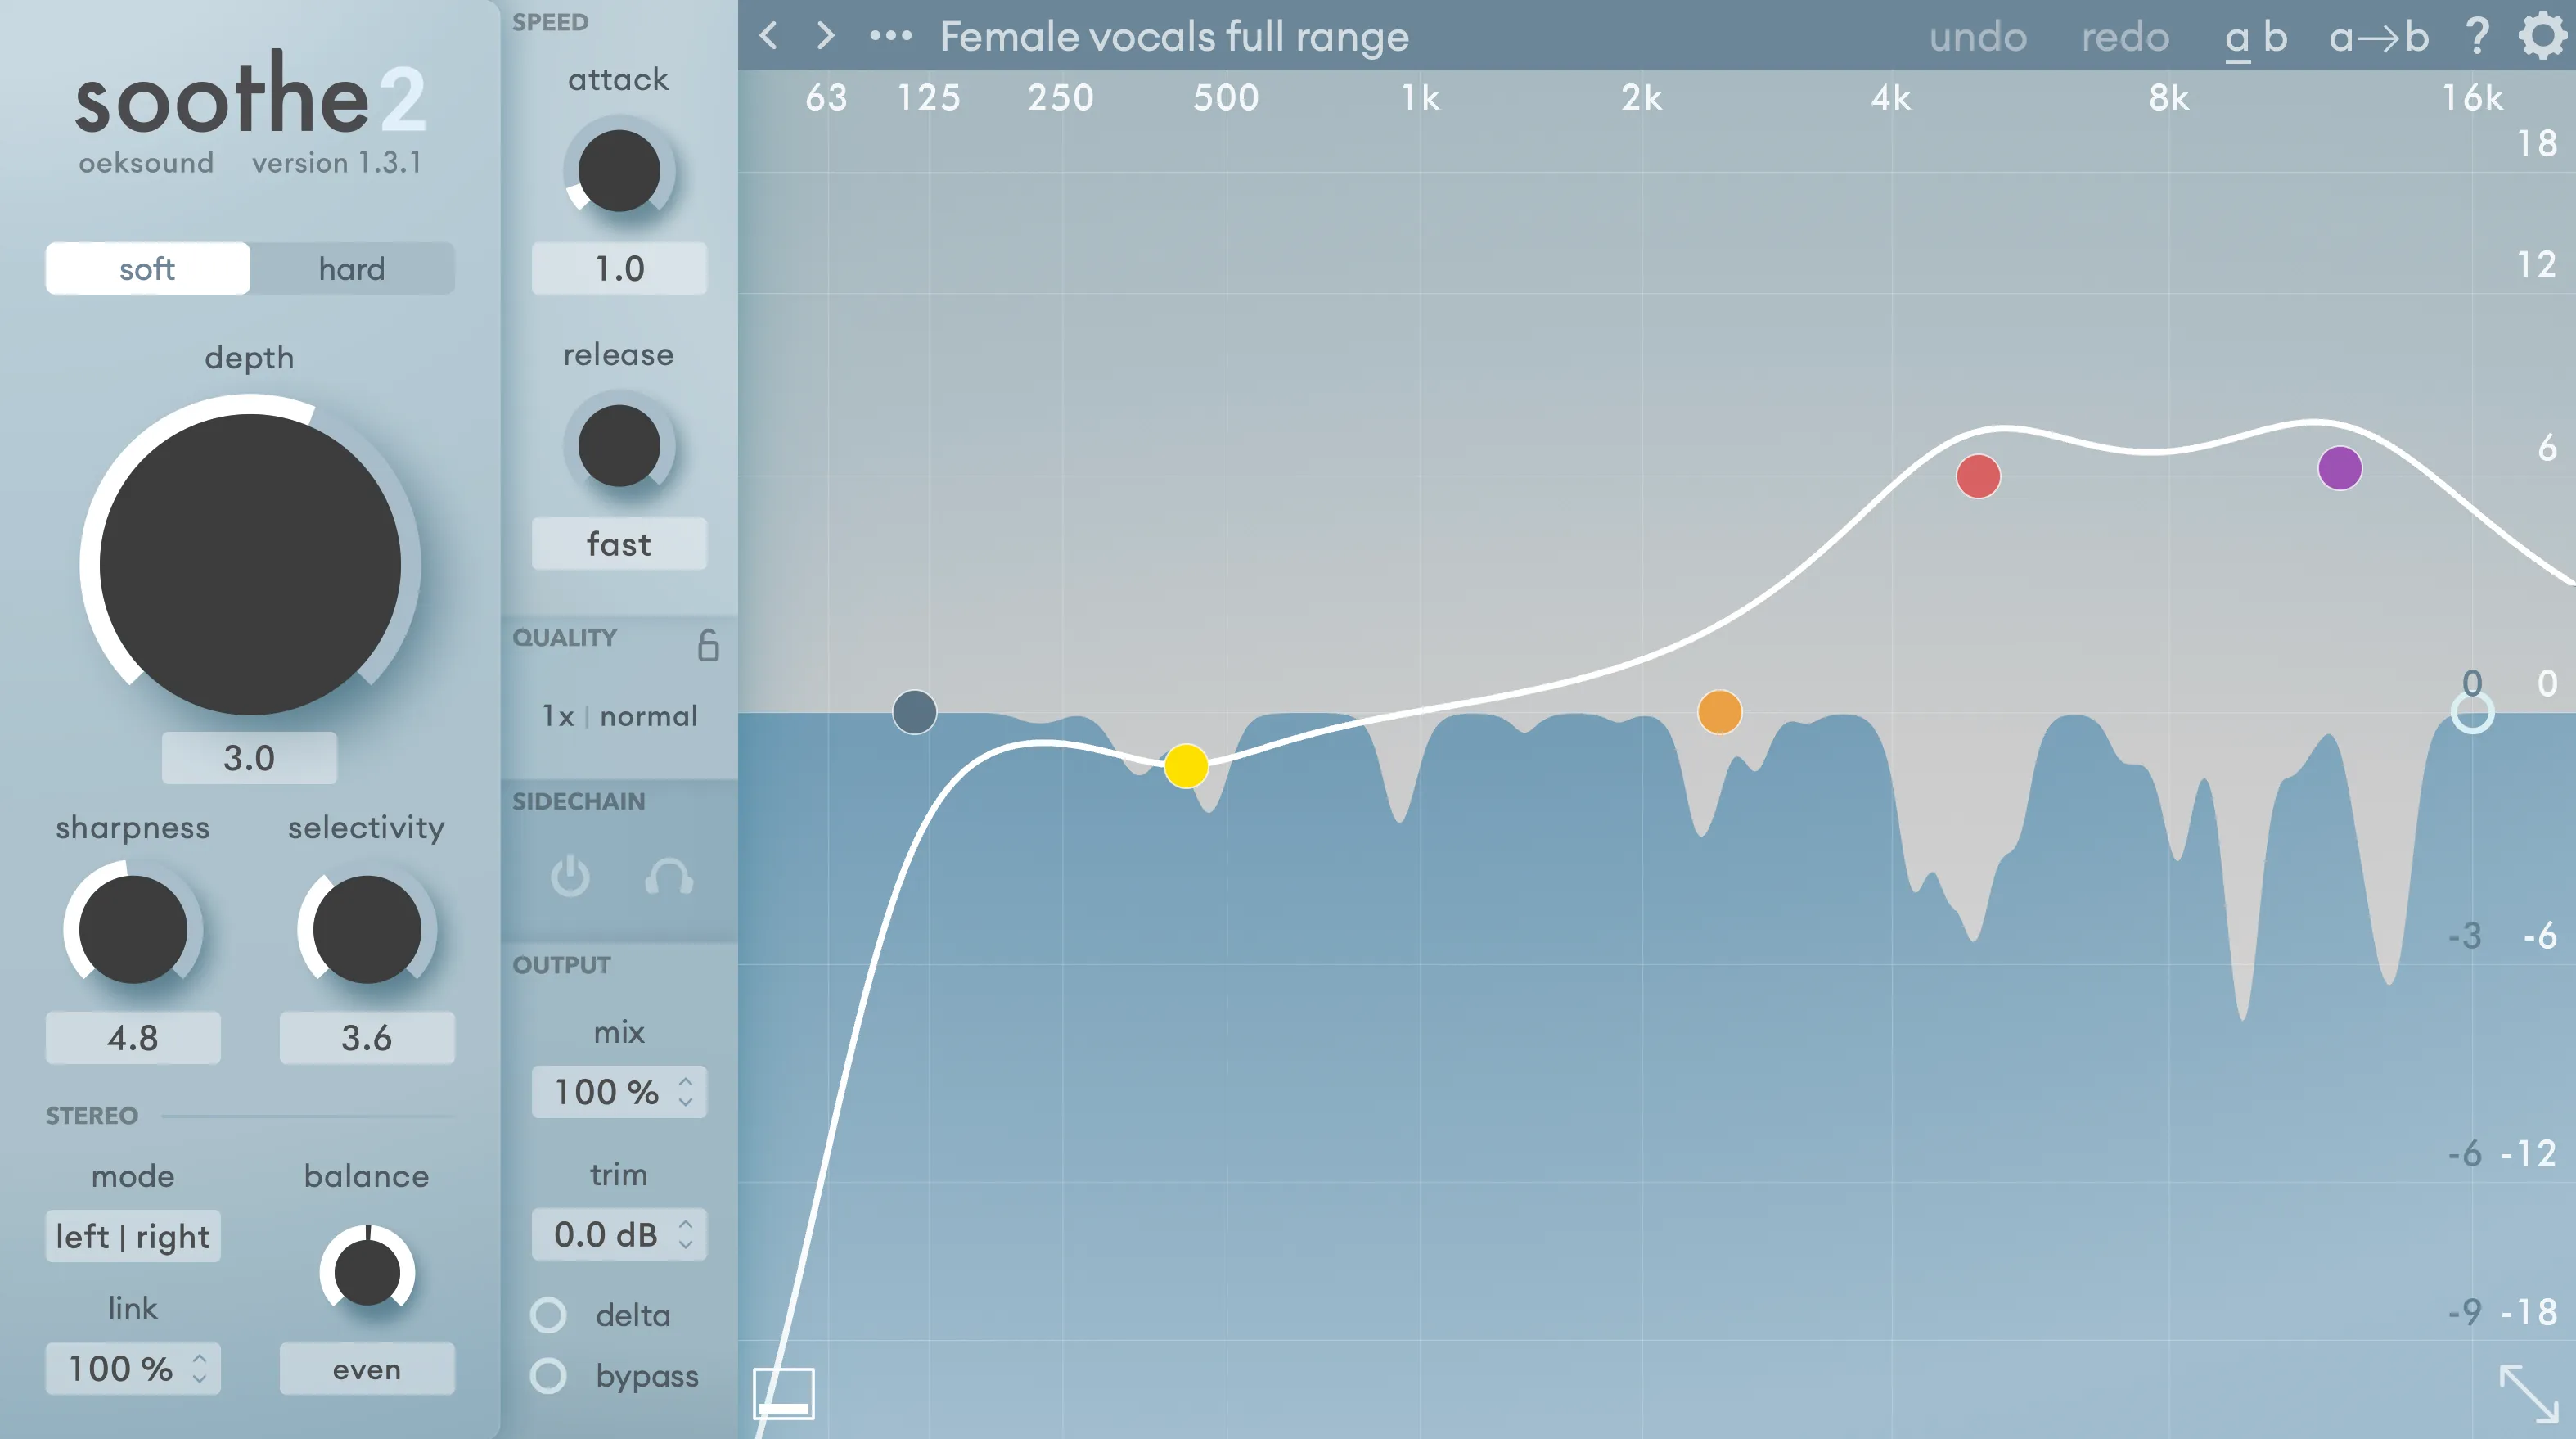
Soothe has a real-time reduction graph — the blue area in the figure on the left — showing the parts of the signal being reduced.
Use the colored EQ nodes to shape the sensitivity curve – shown in white in the figure – to control which frequency areas are processed. ‘Boosting’ specific frequency areas, or a band, reduces resonances more in this area. The curve can be thought of as an inverse EQ or a sidechain EQ. The process doesn’t strictly follow the curve; rather, it’s more sensitive to the frequency areas that are ‘boosted’, and less sensitive to the frequency areas that are ‘cut.’
Adjust the band parameters by dragging the nodes on the frequency graph or by using the knobs in the band controls. Or use the mouse wheel or scrolling gestures to adjust the nodes or knobs. Different adjustment options are available in conjunction with modifier keys. A detailed run through of them can be found in the section modifiers.
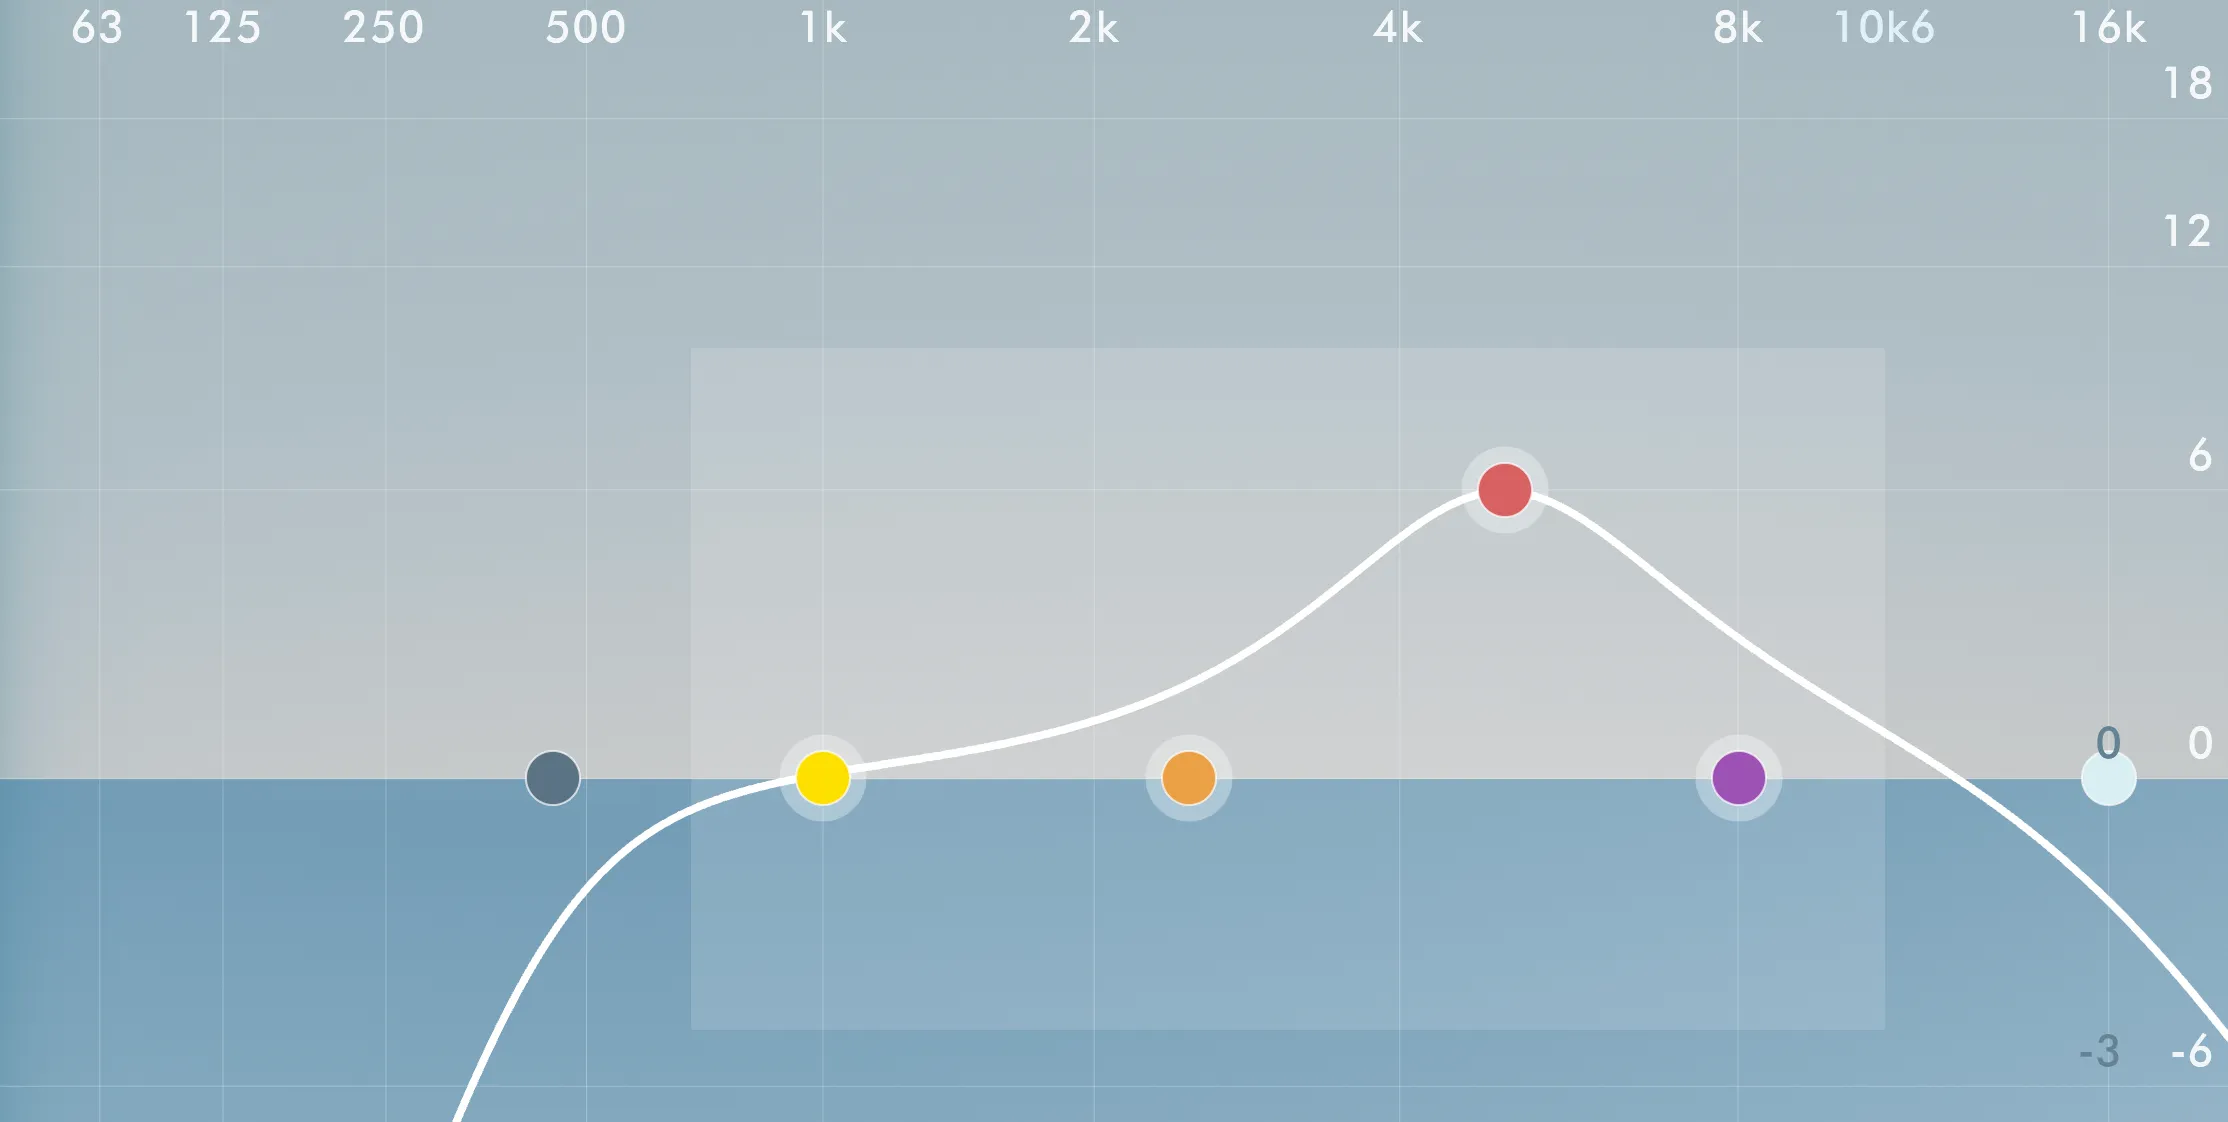
4.1. Band types
Soothe has five bands used to adjust the curve: a low cut, a high cut and four (yellow, orange, red, purple) general-purpose bands. The low and high cut bands offer different steepness slopes which to choose from. The general-purpose bands can be switched from peaking type to several different types: low shelf, high shelf, band shelf, band reject, or tilt.
4.2. Band controls

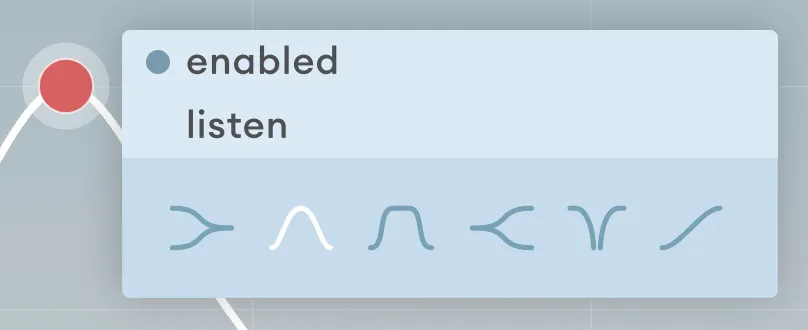
Band on/off

Band listen

Freq

Freq controls the center frequency of the selected band. The frequency is shown in hertz (Hz) with a custom 3-character format, where k signifies 1000s and the subsequent number 100s, i.e. 6k3 = 6300. The frequency can be typed in the textbox in any of the following formats: “6300”, “6k3”, or “6,3k”.
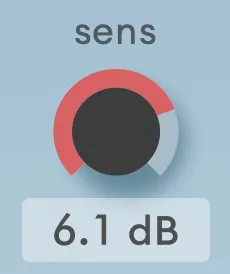
Sens
Q

Balance

The band-specific stereo balance control lets you specify the balance of the selected band according to the main stereo mode. If the plug-in is in mid/side mode, the per-band adjustments will also be made in mid/side mode. This allows you to rebalance the emphasis of the process for a specific frequency range.
For more thorough background information concerning the different balance settings, see the diagram of the processing pipeline.
Curve types

Select a band curve type by clicking the corresponding icon. You can also select the band curve type in the node context menu by right-clicking a node.

Hovering the mouse over the icon will show the name of the curve type or the cutoff steepness.
Hide band controls button

4.3. General features for all EQ nodes
Selection
Select a node by clicking on it. To unselect a node, click anywhere on the graph apart from a node. Multiple bands may be selected for editing by either dragging a box around the nodes or by Shift-clicking ⇧ nodes.
Enabling and disabling a band
Double-clicking a node toggles the band between disabled and enabled. When disabled, the band is bypassed, and changes to it will not affect anything unless enabled again.
Disable multiple nodes by selecting them and opening the context menu by right-clicking any of the nodes and selecting “enabled.” The context menu enable-disable item applies to all selected nodes. This is a quick way to create a flat frequency graph starting point for settings.
Modifiers
Ctrl-click / right-click a node to open the context menu.
The Shift key ⇧ works as an all-around fine adjustment modifier, allowing smaller and more accurate adjustments. This works with nodes and rotaries when using the mouse drag or wheel scroll motions.
Holding the Command key ⌘ on macOS or Ctrl-key on Windows while dragging a node changes the q-value, and the wheel scroll changes the band-specific stereo balance.
Alt-clicking ⎇ or dragging and pressing Alt ⎇ enables the band listen mode. You can release Alt ⎇ after the listen mode is active to keep it activated.
4.4. Other features of the graph

Frequency display
A frequency display follows the mouse cursor on the top of the frequency graph. When dragging a node, it locks to the band’s center frequency.
Editor size button
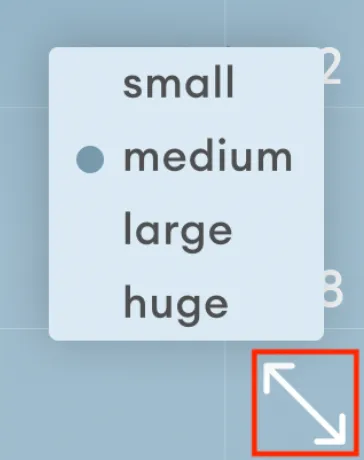
Change the size of the editor (GUI) size by clicking the arrows found at the bottom right.
Context menu
Right-click a node to open the context menu. There you can select some of the choices presented in the band-specific controls area. Only the enable/disable band option applies to all nodes in a selection.
5. Toolbar

5.1. Preset menu
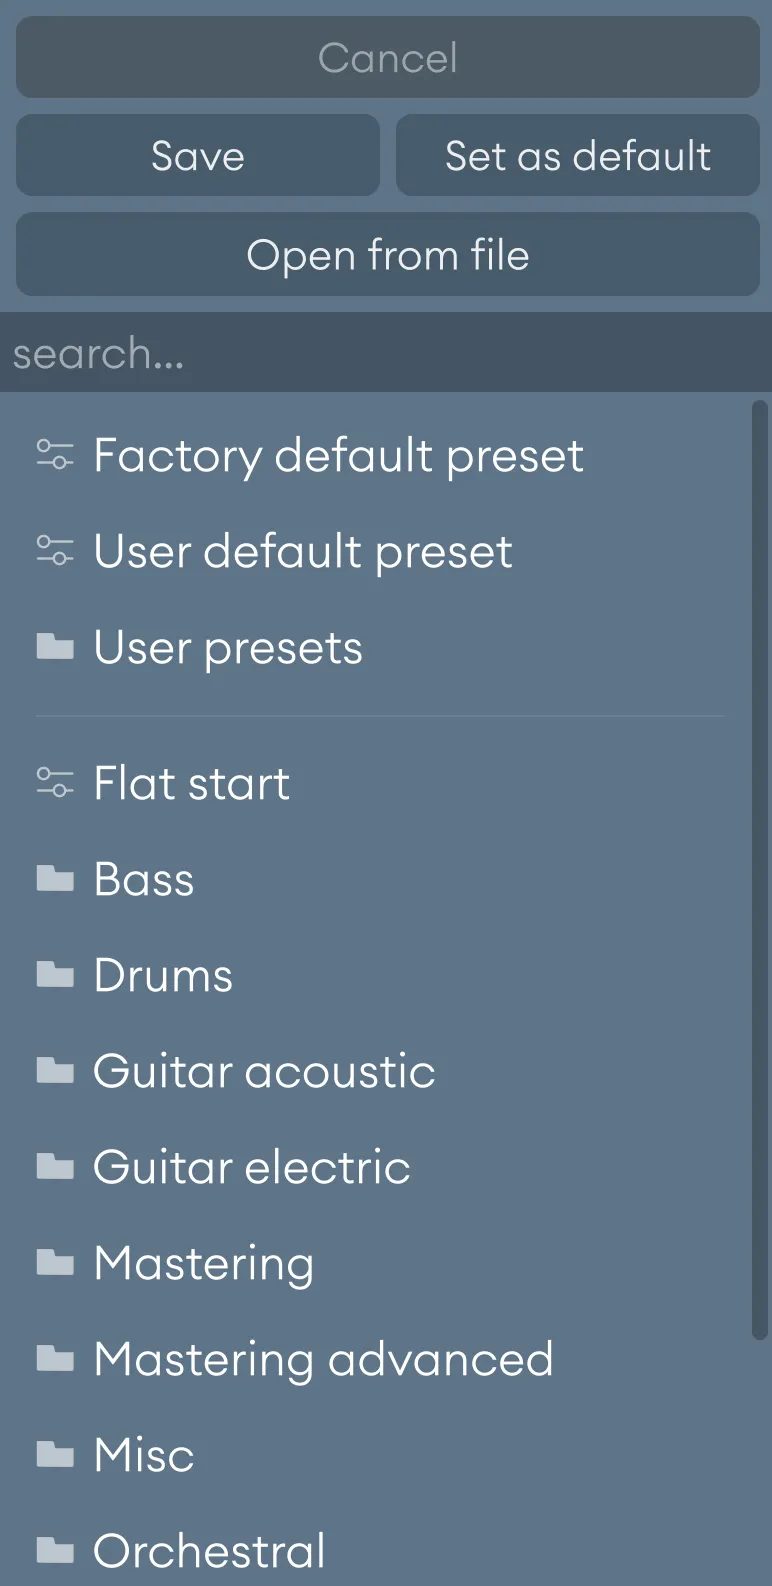
Soothe comes with a selection of factory presets. Click the current preset’s name on the toolbar to open the preset menu. There you can find an additional folder for your own presets. Clicking a preset or using the arrow keys to navigate instantly loads it. Return to the previously selected settings by clicking “Cancel” at the top of the menu. Navigate to the next and previous preset using the arrow buttons in the toolbar.
Please note that for compatibility reasons, Soothe doesn’t reveal its presets to the host’s native preset menu in some DAWs.
Set your default starting point
If you want to use a custom preset for when you open a new instance of Soothe instead of the factory default preset, the preset menu’s “Set as default” will do just this. Please note that the option to load a user default preset is not present before it’s saved for the first time.
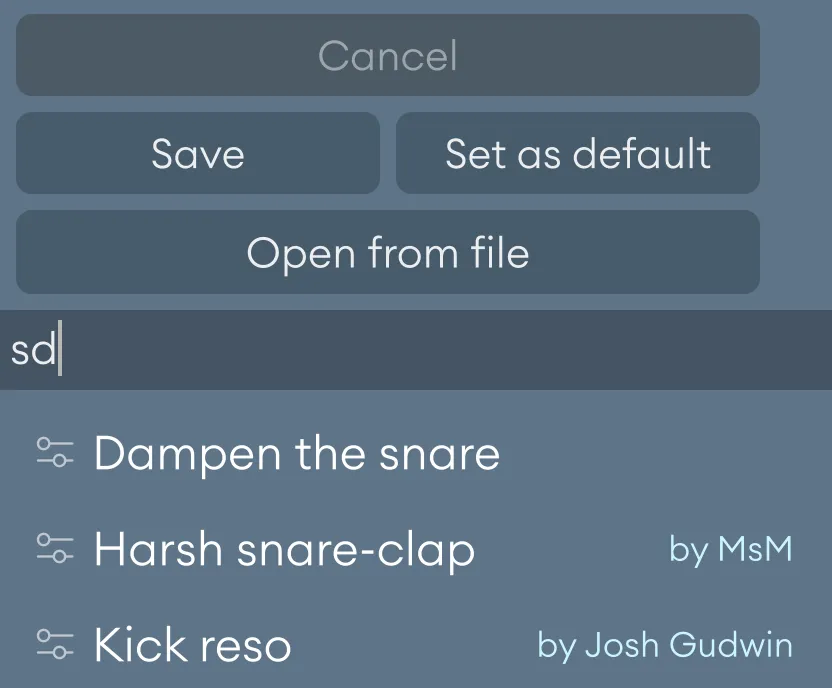
Searching presets
Presets can be searched either by name or by tags. The factory presets have tags that describe their use cases. The artist presets can be searched using the artist’s initials; e.g., “Josh Gudwin” can be searched by typing in “JG.”
Loading presets
Presets can be loaded from the preset menu by clicking a preset or by navigating using the arrow keys. Clicking outside the menu closes it. Clicking “Cancel” while the preset menu is open, the parameters reset to the initial state before opening the menu. The preset menu only displays factory presets and presets in the user’s preset folder. Presets can also be loaded from your computer by clicking on the “Open from file” on the top of the menu.
Saving presets and adding tags

Save presets by opening the preset menu and clicking “Save.” This will let you choose a location and a name for the preset to save. Use the default location for the plug-in to find your presets!
Add custom tags to your saved presets by right-clicking on the preset name and using the menu that opens. Write the tag for the user preset to the “add keyword” text field and click on add.
Deleting presets
Presets can be deleted from the context menu by right-clicking on your saved preset. Alternatively, you can use a file explorer and navigate to the plug-in default location and remove the files.
Importing presets
The presets are saved as .preset files in the default location (see the section describing paths). All Soothe presets work on both macOS and Windows and can be shared between users by putting the files into the default location.
Grouping user presets
You can group your own presets by navigating to the default location with a file explorer and grouping the preset files into folders. These are parsed into the preset menu when the menu is opened.
5.2. Undo/redo

Undo has a predetermined number of maximum steps exclusive to both A and B states.
Note: If you’re using Logic Pro, please only use the undo/redo system of Soothe. Using Logic’s built-in one might yield unexpected results, especially when used together with A/B states.
5.3. Comparing settings with A/B switching

A/B Switch, A/B Copy, Help and Configurations
Compare two different sets of settings by clicking the A/B switch button. All changes in the settings are set for the highlighted and underscored state (a or b).
Copy the settings in the current state to the other by clicking the A->B or B->A button.
5.4. Help menu
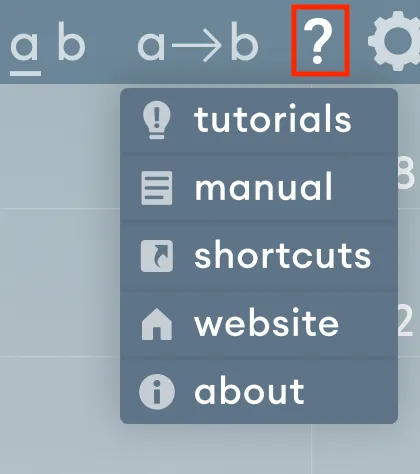
The help menu contains various useful resources. Click the question mark icon in the toolbar to access it. The different options in the menu are summarized below:
- tutorials
Leads to a set of interactive tutorials that guide you through the plug-in features with the help of demo audio material. - manual
Opens this manual as a PDF file. - shortcuts
Displays a window containing a reference guide of all the different keyboard shortcuts supported by the user interface. - website
Opens the oeksound website in the default web browser. - about
Displays a window with information about the plug-in, including its version and format.
5.5. Configuration menu
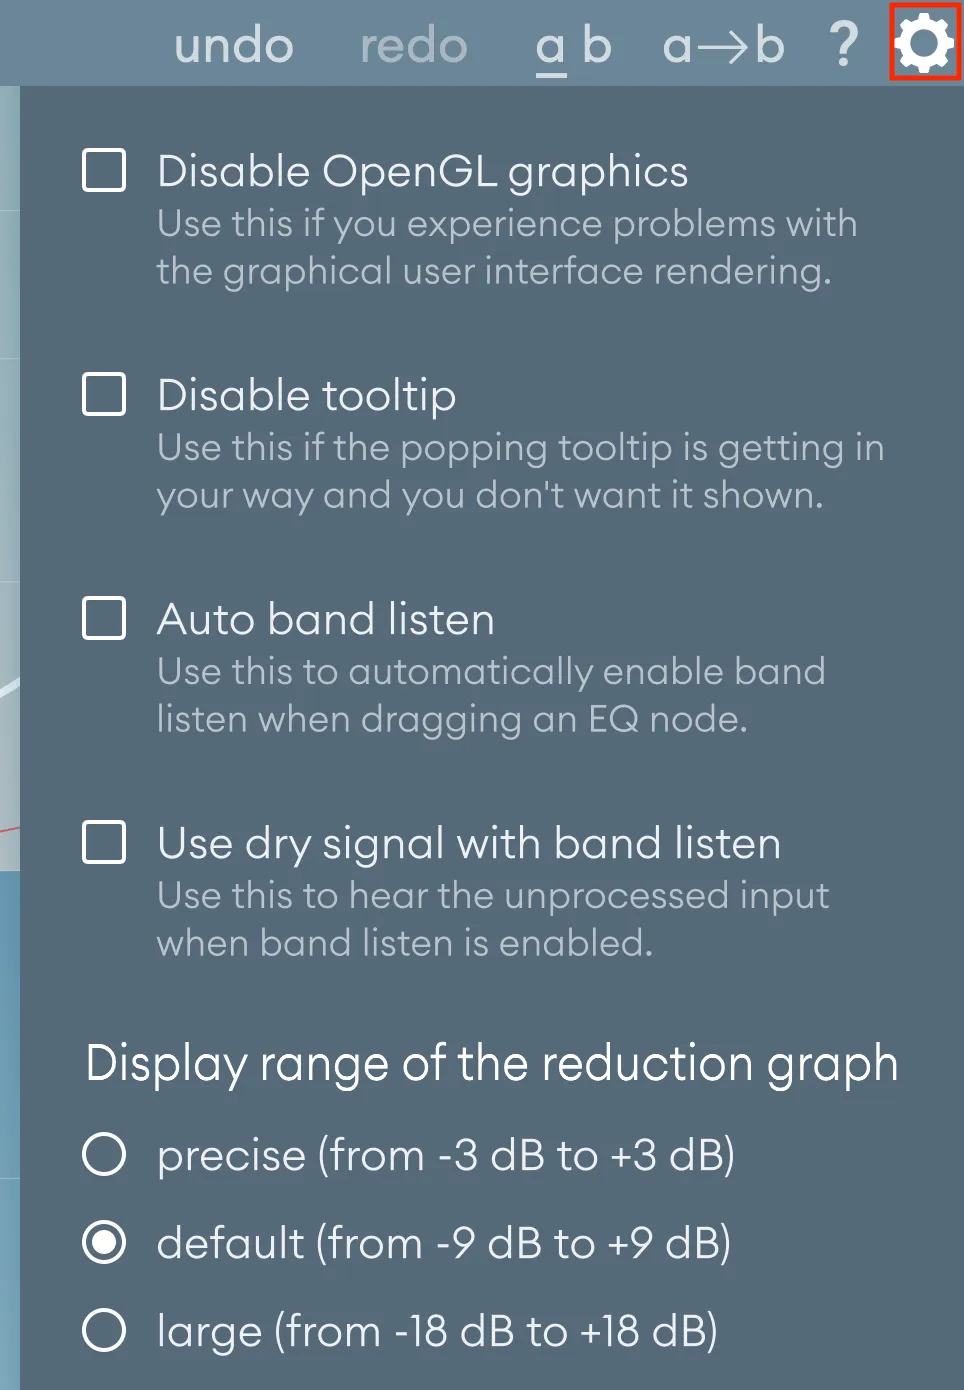
Open the global configuration menu by clicking on the cogwheel icon at the right end of the toolbar. From this menu, multiple settings can be configured, affecting all instances of Soothe. The different settings are explained in detail below.
Disable OpenGL graphics
OpenGL graphics mode is the fastest and prettiest option for most computer setups. Disabling it is intended as a fallback feature for only an unfortunate few who might have issues with graphics rendering. For example, those that run Soothe on specific older hardware with Windows 7.
Disable tooltip
Tooltips are displayed on the top left corner of the graph area by default. Activate a tooltip by hovering over a parameter with your mouse to see relevant information about the parameter in question. Turn off this function by checking the “Disable tooltip” setting.
Auto band listen
When enabled, the band listen mode automatically turns on when dragging an EQ node. This is useful if you always want to hear the delta or dry signal when moving EQ nodes around to know which frequencies your change affects.
Use dry signal with band listen
By default, Soothe outputs the delta signal of the band’s frequency range when in band listen mode. With this setting is enabled, the dry signal will be passed through instead.
Display range of the reduction graph

Soothe offers three options for the reduction graph’s (in blue) display range. This changes the range of visualizing the effective reduction between precise and large. Changing this setting sets the blue dB labels accordingly, as shown in the figure on the right.
6. Miscellaneous
6.1. Input trim
Soothe includes a hidden input trim parameter intended for some special cases. For example, when mixing a voice-over and the processing can’t be driven hot enough. In this case, it can be more convenient to trim the input directly in the plug-in before processing it. While it is a requested feature, we prefer not to use this by default as the soft-hard mode, depth, and selectivity settings should suffice. This is why the input trim is hidden from the GUI and can be shown through your DAW.
For example, you can select input trim from the automation parameters and amplify the signal in the automation view. In some DAWs, you can disable the default GUI for a parameters-only view of the plug-in, in which the input trim will also be present. After tweaking the parameter, you can return to the default plug-in GUI, and the parameter value will stay set in the background.
The input trim is saved with presets.
6.2. Version update checks
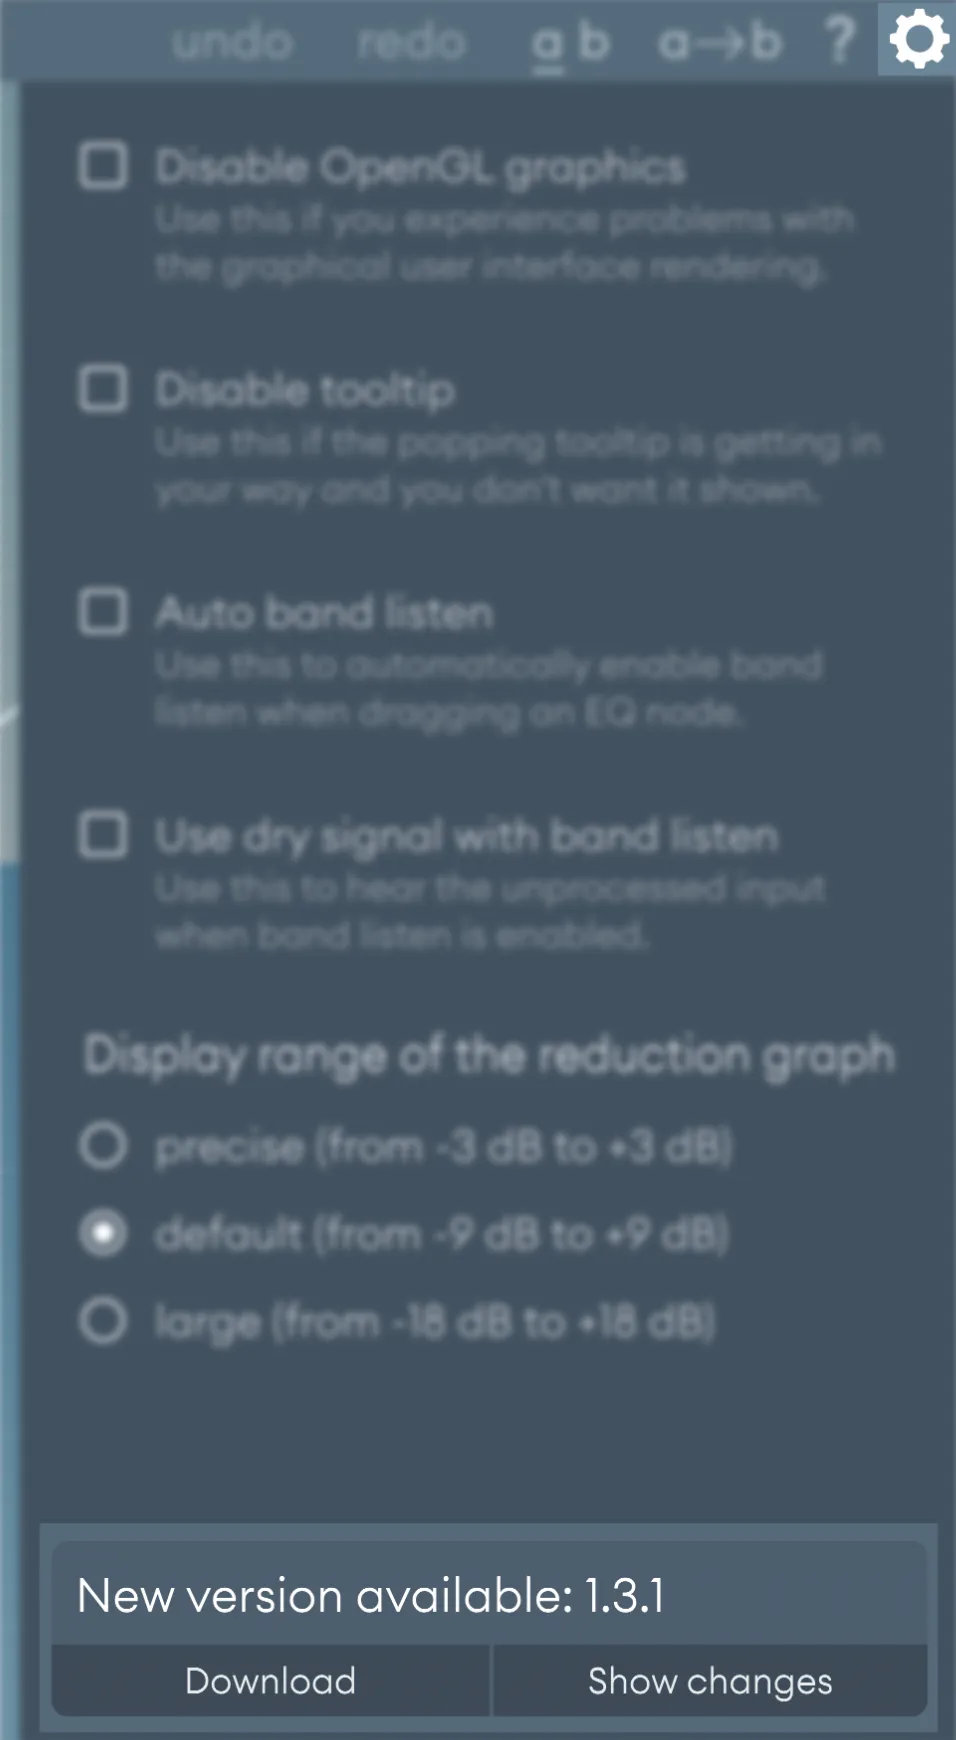
Soothe automatically checks for new plug-in versions in the background.
When a new version is available, an exclamation mark will be displayed on the configuration menu button. Information about a possible update is shown at the bottom of the configuration menu.
Updates are provided for good reasons, such as bug fixes and performance improvements. We always ensure that presets are backwards compatible with all Soothe2 versions to come. We take great care to ensure that things don’t break between updates.
7. Paths for presets and uninstallation
7.1. macOS
User presets:
/Users/<username>/Documents/oeksound/soothe2/Presets
Configuration file:
/Library/Application Support/oeksound/soothe2/config.xml
The macOS uninstaller can be downloaded separately from our downloads page: https://oeksound.com/downloads/#uninstaller.
7.2. Windows
User presets:C:\Users\<username>\Documents\oeksound\soothe2\Presets
Configuration file:C:\ProgramData\oeksound\soothe2\config.xml
Please use the “Add or Remove Programs” -function (or similar) to uninstall Soothe2.
FAQ and support
You can find our FAQ section on our website: https://oeksound.com/support
If our FAQ doesn’t answer your question, or if you find a bug, don’t hesitate to email us at: support@oeksound.com
Appendix: Diagram of the processing pipeline
Copyright and acknowledgements
Copyright oeksound Ltd 2021. All rights reserved. VST is a trademark and software of Steinberg Media Technologies GmbH. VST PlugIn Technology by Steinberg Media Technologies
 VST is a trademark and software of Steinberg Media Technologies GmbH.