spiff user manual
- 1. Introduction
- 2. Quick start
- 3. Parameters
- 3.1. Cut and boost modes
- 3.2. Main section
- 3.3. Stereo section
- 3.4. Output section
- 3.5. Advanced section
- 4. Frequency and reduction graph
- 4.1. Band listen
- 5. Toolbar
- 5.1. Preset menu
- 5.2. Undo/redo
- 5.3. Comparing settings with A/B switching
- 5.4. Help menu
- 5.5. Configuration menu
- 5.6. Version update checks
- 6. Paths for presets and uninstallation
- 6.1. macOS
- 6.2. Windows
- FAQ and support
1. Introduction
Thank you for choosing Spiff!
Spiff is an adaptive transient processor that cuts or boosts only the frequencies that make up the transient material, keeping the rest of the audio signal intact.
Spiff was originally designed to attenuate or remove sharp clicks, such as mouth noises on vocal recordings. These clicks can be a byproduct of excessive compression, treble boost, suboptimal microphone choice, or just an unwanted part of the performance. Spiff has been carefully tweaked to work well on vocal tracks, introducing minimal artifacts and leaving the rest of the signal intact. Because of this, it turned out to be an equally useful tool for almost any sound source.
It is recommended that you read through the manual to understand all the details about Spiff. Alternatively, you can use the integrated tutorials in the plug-in or this quick-start guide if you want to get right to it:
2. Quick start
- When you have added Spiff to a channel with audio material, start by turning on delta, and turn up the depth a bit to hear what Spiff is reacting to.
- Decide if you want to cut or boost this.
- Next, adjust the sensitivity and decay controls until you have focused on the part of the transient material you want to control.
- Use the nodes on the frequency graph to filter out the frequencies you don’t want to process or boost frequencies you want to process more.
- Adjust the sharpness and decay lf/hf values to taste (they can often be left to default value).
- Turn off delta monitoring and adjust depth again.
- Bypass to hear what Spiff has added or removed and trim the output signal to match the original volume.
- When cutting, a good rule of thumb is to place Spiff as the last insert of the channel for the smoothest results. When boosting, Spiff usually works best early in the signal chain, before any compressors, limiters, or saturators.
3. Parameters
3.1. Cut and boost modes
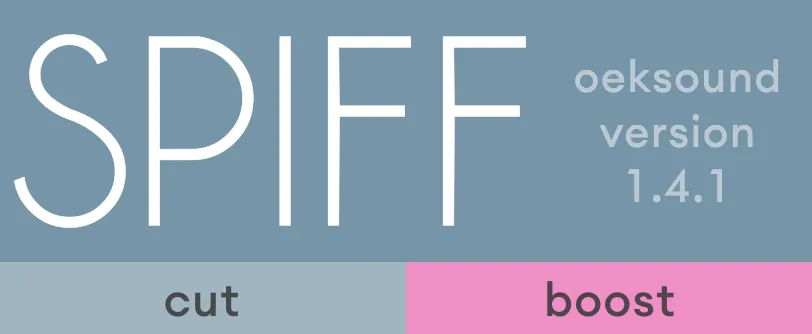
Spiff can be used to either cut or boost transient material. Cuts or boosts are applied only on frequency areas containing transients. If you apply Spiff to a kick drum, it won’t boost the boxy frequencies around 300 Hz unless there is transient information.
3.2. Main section

Depth determines how much processing is being applied: more depth results in bigger cuts or boosts. Spiff is input-level independent, so you can put it anywhere in your signal chain, and it will always work according to the depth value, regardless of the gain staging.

Sensitivity controls how Spiff detects transients. Higher values mean it detects more transients. Lower values mean only louder transients are detected. Easy to remember as more or less sensitive. The best way to hear what sensitivity does is first to enable the delta mode, crank up the depth and then adjust sensitivity to taste.
Sharpness controls the bandwidth (or q) of all separate cuts or boosts Spiff performs. Lower values sound more natural on percussive material (like drums), while higher values work well on harmonic material with a wide frequency range, like the piano.
Decay refers to the time it takes for a cut or boost to recover to its initial level. A higher value results in a longer recovery time. When set to 0, only the very beginning of the transient is adjusted. Increasing decay applies processing to the tail after the initial transient. Values lower than 5 produce the most natural results. Higher values can be beneficial for creative uses!
Decay lf/hf (low frequency / high frequency) is used to adjust the relative difference in decay time between low and high frequencies. Lower values mean that low frequencies have a longer decay time than high frequencies. Higher values mean high frequencies take longer to recover than low frequencies. In the center, the decay time is equal across the frequency spectrum. Values lower than 5 tend to sound the most transparent.
3.3. Stereo section

When running as a stereo instance, Spiff can control the link between the two channels with these parameters.
Stereo mode determines if you control the left and right channels separately or the mid and side channels separately.
Stereo link on 100% will combine the side-chain signals and apply the same reduction for both channels. Stereo link at 0% will make Spiff act as two mono instances (dual mono).
Balance refers to the amount of processing applied between each channel. When adjusted to either extreme, the value window will change to show which channel is being processed (left only, right only, mid only, or side only). At 100/0, only the mid (or left) channel is processed. At the center position, 100/100, both channels are processed equally, and when set to 0/100, only the side (or right) channel is processed.
3.4. Output section
The output section lets you adjust the monitoring and levels. With the mix parameter, you can combine the original dry signal together with the processed one. You can, for example apply heavy processing with Spiff and then mix some dry signal back in for a more transparent result. With mix on 100%, only the processed (wet) signal gets to the output, and with 0% only the unprocessed (dry) one gets out. The mix parameter also works while the delta is enabled, blending the dry signal with the delta.
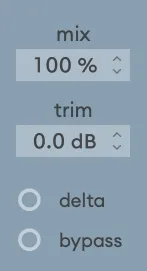
Trim is the make-up gain control for the processed signal to compensate for any changes in level that Spiff introduces. It affects only the wet part of the mix.
The delta toggle presents the difference between the wet and dry signals. This is useful for monitoring the part of the signal that Spiff is affecting. With delta, you can understand what Spiff is reacting to and adjust accordingly.
The bypass toggle is a soft bypass for quick A/B comparison without the glitches that some DAWs’ own plug-in bypass might introduce. Please note that Spiff continues to compute the output, using the bypass toggle won’t save you any processing power. To disable the plug-in, you should always deactivate it from the host.
3.5. Advanced section
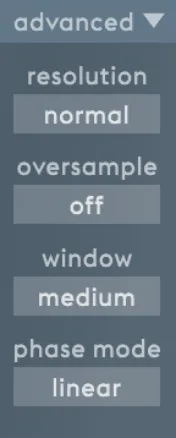
Clicking the advanced bar presents you more options on how Spiff operates.
If you need more fidelity than the default configuration offers, you can add oversampling and resolution to the process. These should be reserved for the master bus or mastering applications when the sound material being processed is very complex. As a rule of thumb, the default settings are probably fine for individual tracks. You can evaluate this using the delta toggle.
Resolution determines the time resolution of the processing. With increased resolution, Spiff updates its internal settings more often and detects when a transient occurs more accurately.
Oversample calculates the reduction filter in higher resolution. Higher values result in a smoother frequency response and better accuracy, especially at lower frequencies.
Please note that for both oversample and resolution, the higher settings can be extremely demanding on the CPU!
Window sets the tradeoff between time and frequency resolution. The short window setting has minimal ringing and is great for detecting extremely fast transients. As a tradeoff, it has worse lower frequency handling. Short window is great for transparent cut settings, such as click removal. Long window, on the other hand, rings more but sounds smoother. Long window shines on complex and polyphonic sources, such as the piano. Medium window is a tradeoff between the two and is a good generic setting. When in doubt, you can always go with this one.
Phase mode selects between linear phase and minimum phase processing. Linear phase mode is recommended for surgical cuts, especially when combined with the short window. The linear phase mode may introduce an audible pre-ring, especially if used to process low frequencies. Minimum phase mode eliminates pre-ring. This can be better for boosts and often sounds more natural but is less accurate. Minimum phase mode is also a bit heavier on the CPU.
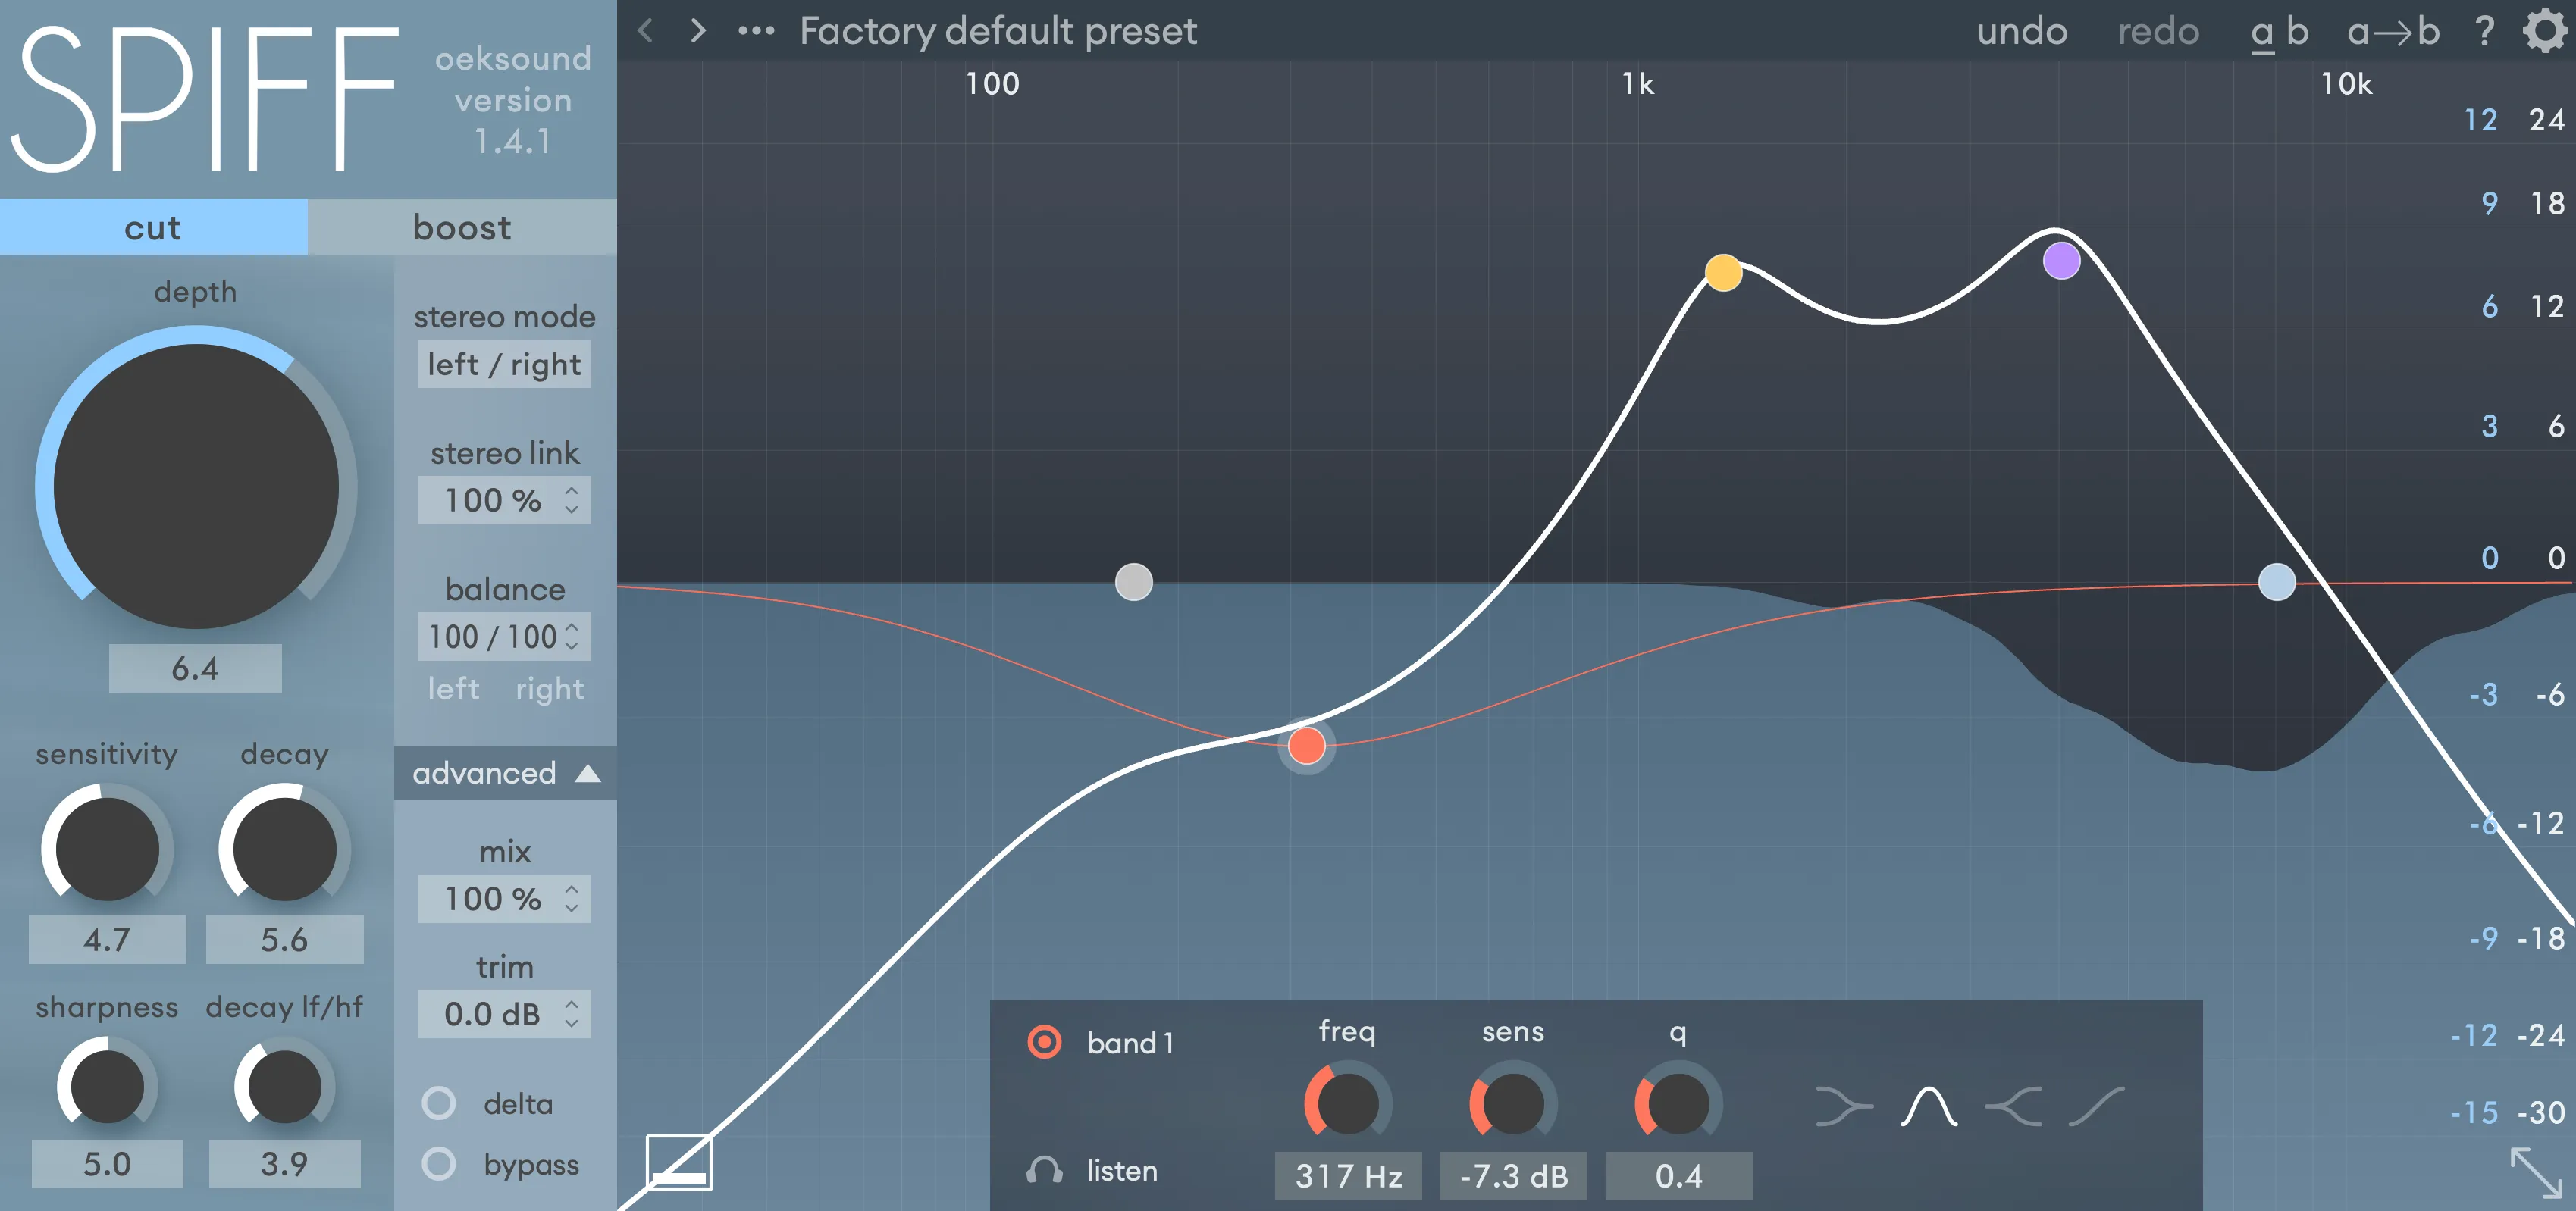
4. Frequency and reduction graph
Spiff uses a real-time graph showing the parts of the signal being processed.
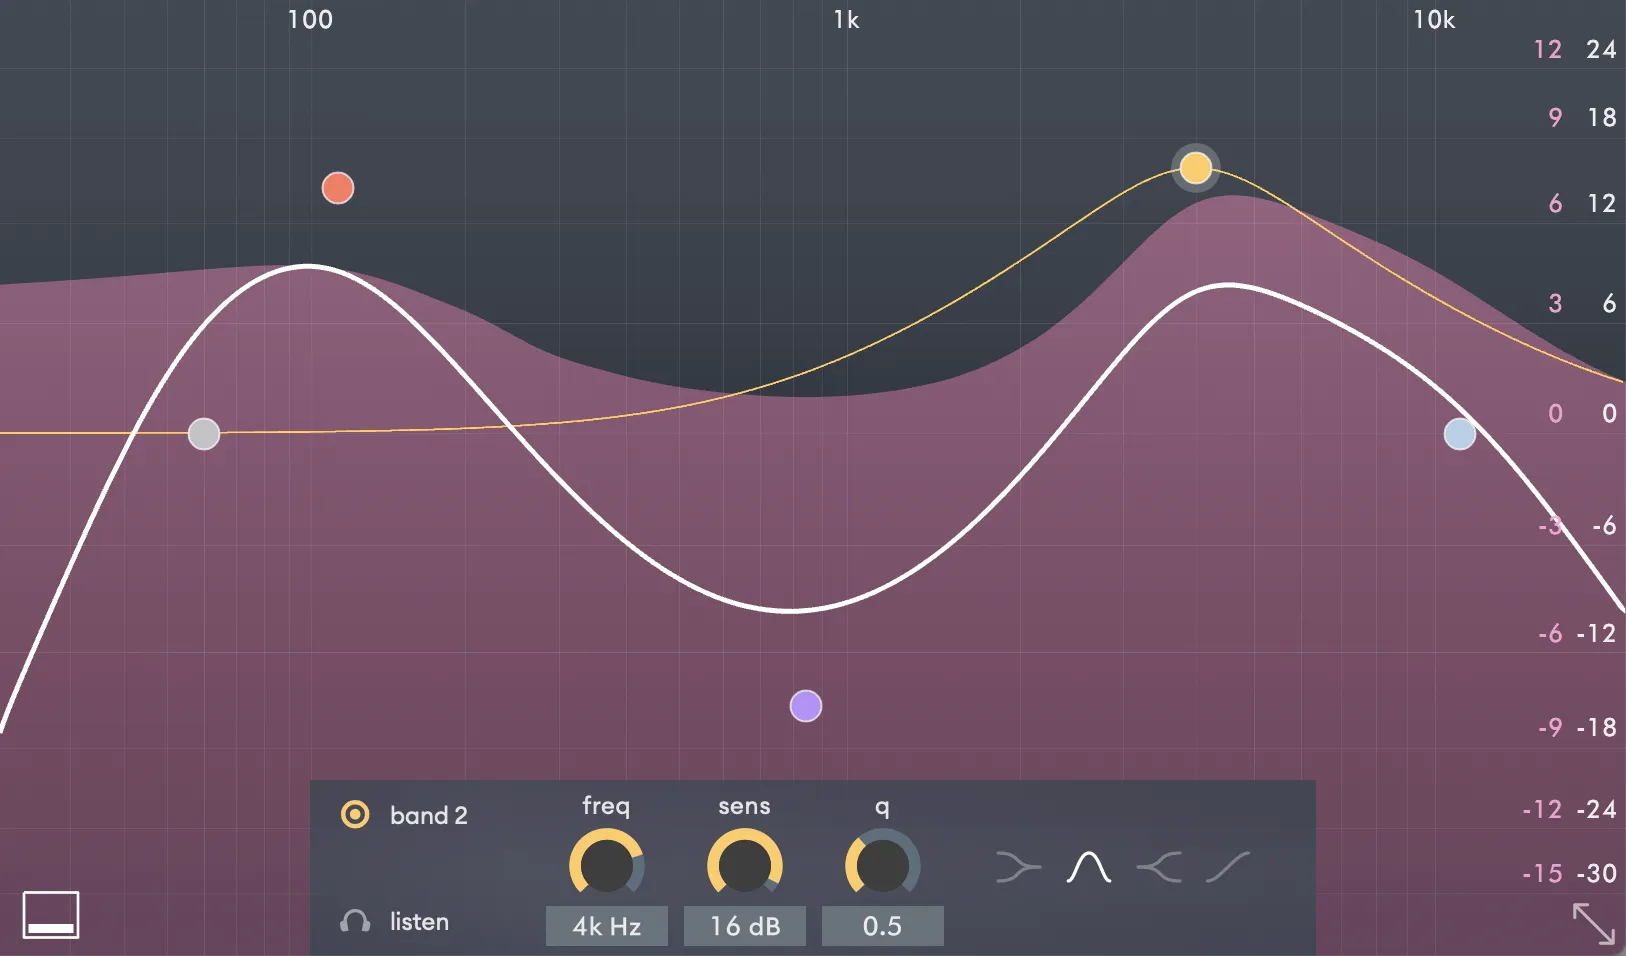
The frequencies being affected can be controlled using the sensitivity curve in the frequency graph section. Please note that this is not actually an EQ, but a weighting for the processing. You can think of it as a sidechain EQ.
Dragging a band upwards increases the amount of processing for that band and vice versa. Using the high- and lowpass filters, you can make Spiff ignore the areas above and below specific frequencies.
In the example above, Spiff is used in boost mode (shown by the pink color). Spiff is dialed to boost more around 100 Hz and 4 kHz using the red and yellow bands. The broad cut made with the purple band makes Spiff boost less in the mid-range. The filters make Spiff ignore frequencies below 30 Hz and over 11 kHz.
Spiff has five bands that let you control the sensitivity curve. You can select a band by clicking on the corresponding node. Adjust the band parameters by dragging the nodes on the graph or by using the knobs in the band section at the bottom of the graph. You can adjust the width (or q) by holding a modifier key and dragging it up/down. The modifier key is Cmd on Mac and Ctrl on Windows.
The red, yellow, and purple bands can be set to parametric, low shelf, high shelf, or tilt shelf mode. You can set the slope in decibels per octave of the lo cut and hi cut bands from the band controls shown below.

Multiple bands can be selected for editing by either dragging a box around the nodes or by holding the Shift key ⇧ while selecting nodes. You can bypass a band by double-clicking on the node or by clicking on the toggle on the left-hand side of the band controls, labeled “band 1” in the screenshot.
4.1. Band listen
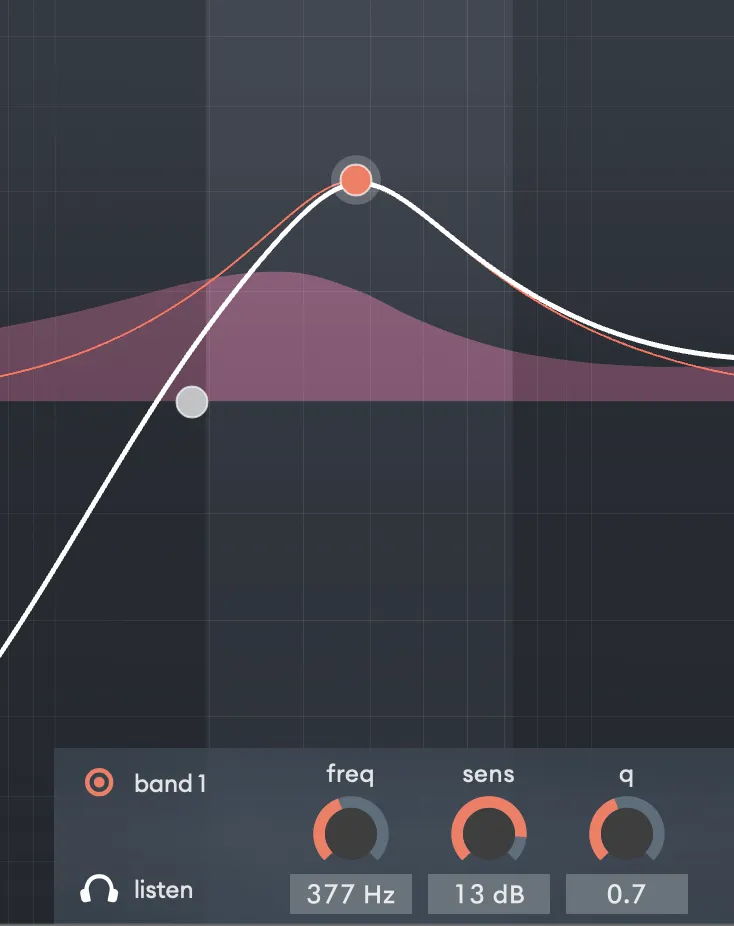
Toggle the band listen button to monitor the delta signal on the frequency area that the selected band affects. Sweeping over the frequency spectrum with band listen enabled you quickly find the part of the signal you want to process. Band listen can also be momentarily enabled by holding the Alt key while dragging a node.
5. Toolbar

5.1. Preset menu
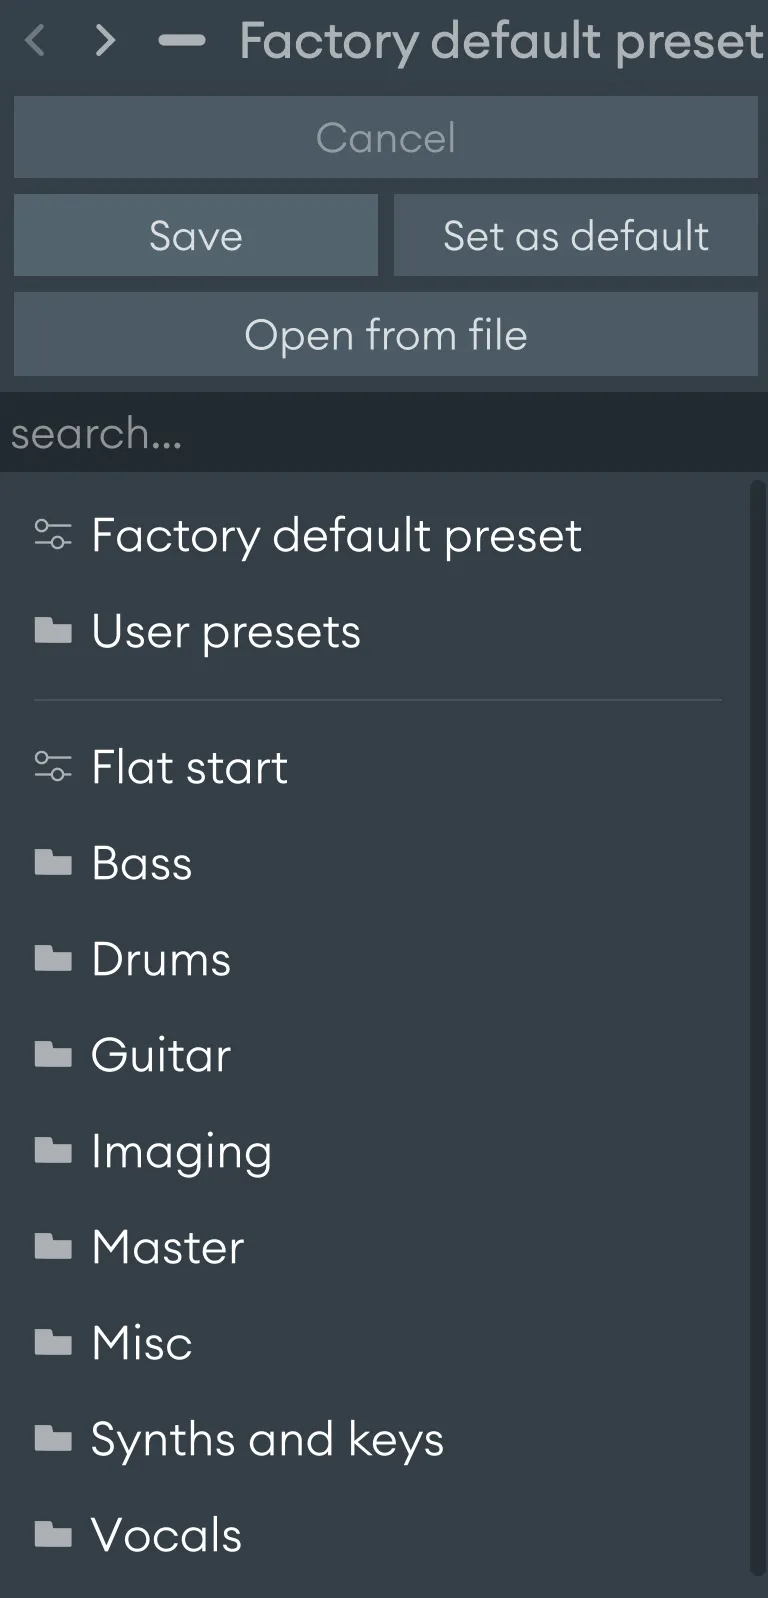
Spiff comes with a selection of factory presets. Click the current preset’s name on the toolbar to open the preset menu. There you can find an additional folder for your own presets. Clicking on a preset or using the arrow keys to navigate instantly loads it. Cancel loading a preset by clicking “Cancel” at the top of the menu. Navigate to the next and previous preset using the arrow buttons in the toolbar.
Please note that for compatibility reasons, Spiff does not reveal its presets to the host’s native preset menu in some DAWs.
Set your default starting point
If you want to use a custom preset for when you open a new instance of Spiff instead of the factory default preset, the preset menu’s “save as default” will do this. Please note that the option to load a user default preset is not present before it’s saved for the first time.
Searching presets
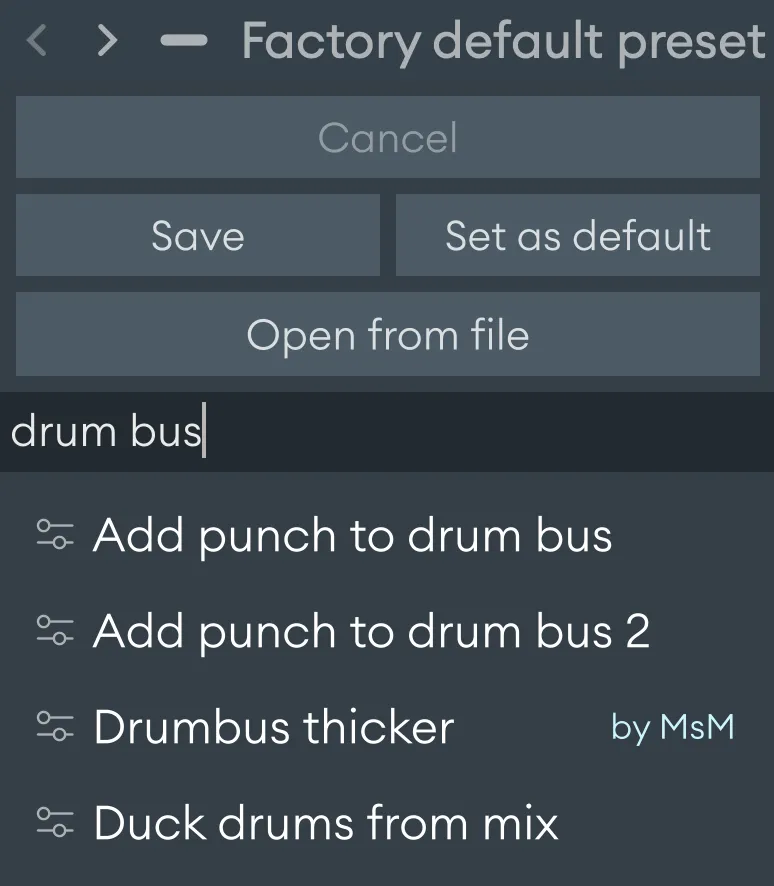
Loading presets
Presets can be loaded from the preset menu by either clicking a preset or by navigating with the arrow keys. Clicking outside the menu closes it. Clicking “Cancel” while the preset menu is open, the parameters are reset to the initial state before opening the menu. The preset menu only displays factory presets and presets in the user’s preset folder. Presets can also be loaded from your computer by clicking on the “Open from file” on the top of the menu.
Saving presets and adding tags
Save presets that are useful to you by opening the preset menu and clicking “Save”. This will let you choose a location and a name for the preset to save. Use the default location for the plug-in to find your presets!

You can add custom tags to your saved presets by right-clicking on the preset name and using the context menu that opens. Write the tag for the user preset in the text field where it says “add keyword” and click on add.
Deleting presets
Presets can be deleted via the context menu, which can be opened by right-clicking on your saved preset. Alternatively, you can use a file explorer to navigate to the plug-in default location and remove the files.
Importing presets
The presets are saved as .preset files in the default location for the application (see the section describing paths). All Spiff presets work on both macOS and Windows and can be shared between users by putting the files into the default location.
Grouping user presets
You can group your own presets by navigating to the default location with a file explorer and grouping the preset files into folders. These are parsed into the preset menu when the menu is opened.
5.2. Undo/redo

Note: If you’re using Logic Pro, please only use the Spiff’s undo/redo system. Using Logic’s built-in one might yield unexpected results, especially when used together with A/B states.
5.3. Comparing settings with A/B switching

A/B Switch, A/B Copy, Help and Configurations
You can compare two different sets of settings by clicking the A/B switch button. All changes in the settings are set for the highlighted and underscored state (a or b).
You can copy the settings in the current state to the other by clicking the A->B copy button.
5.4. Help menu

The help menu contains various useful resources and is accessed by clicking on the question mark icon in the toolbar. The different options in the menu are summarized below:
- tutorials
Leads to a set of interactive tutorials that guide you through the plug-in features with the help of demo audio material. - manual
Opens this manual as a PDF file. - shortcuts
Displays a window containing a reference guide of all the different keyboard shortcuts supported by the user interface. - website
Opens the oeksound website in the default web browser. - about
Displays a window with information about the plug-in, including its version and format.
5.5. Configuration menu
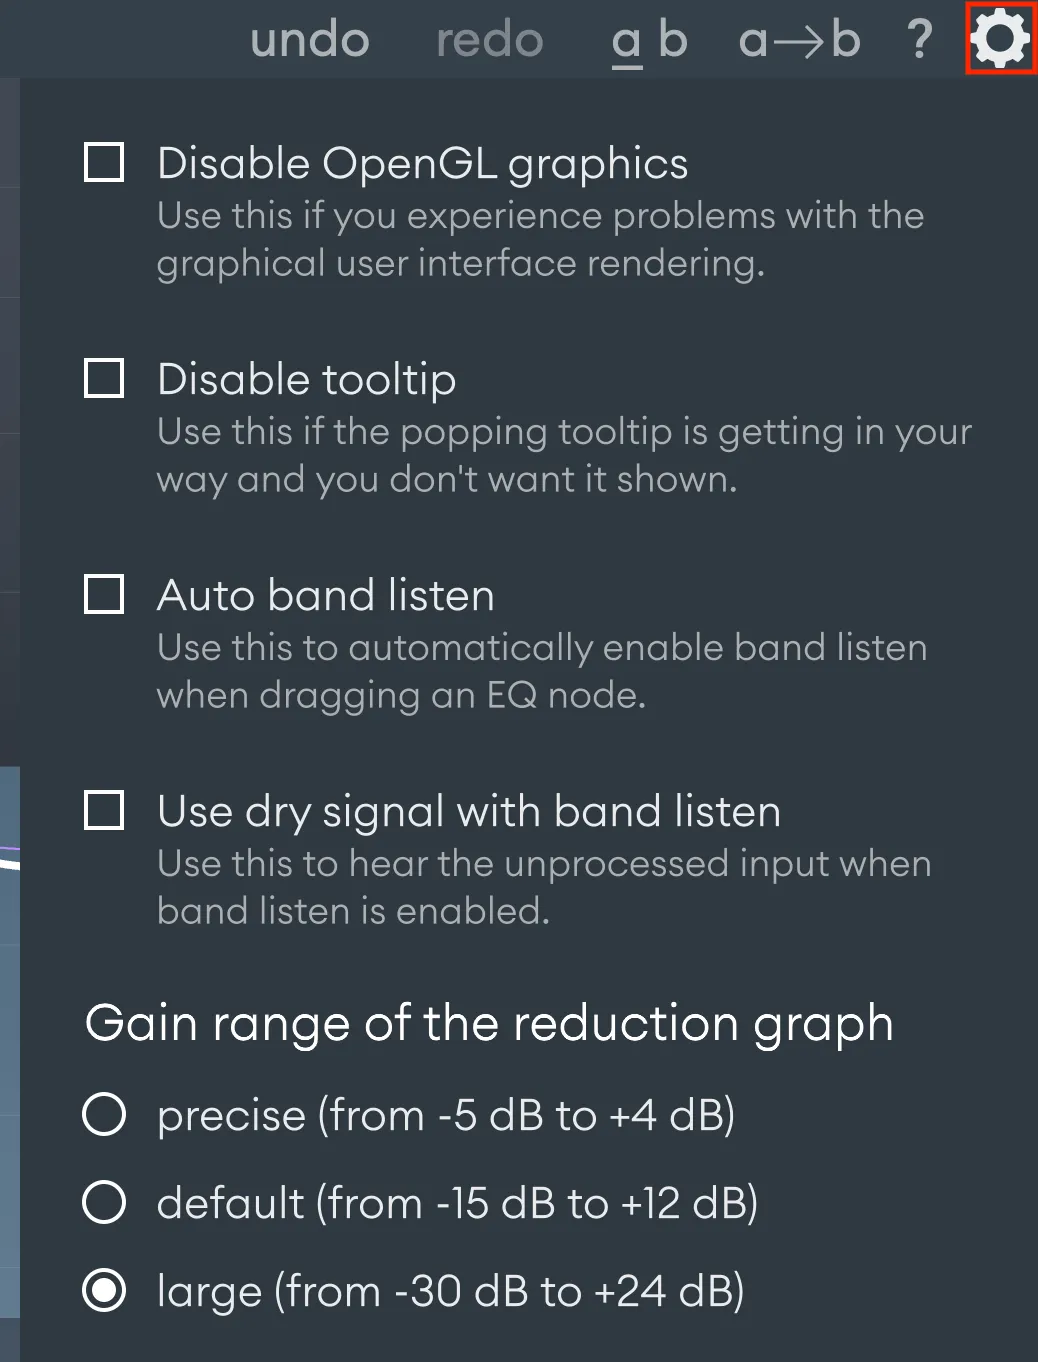
Open the global configuration menu by clicking on the cogwheel icon at the right end of the toolbar. From this menu, different settings can be configured that affect all instances of Spiff. These settings are explained in detail next.
Disable OpenGL graphics
OpenGL graphics mode is the fastest and prettiest option for most computer setups. Disabling it is intended as a fallback feature for only an unfortunate few that might have issues with the graphics rendering. For example, those that run Spiff on specific older hardware with Windows 7 and their unrepaired driver issues.
Disable tooltip
Tooltips are displayed on the top left corner of the graph area by default. Activate a tooltip by hovering over a parameter with your mouse to see relevant information about the parameter in question. Turn off this function by selecting the “Disable tooltip” setting.
Auto band listen
When enabled, the band listen mode will automatically turn on when dragging one of the EQ nodes. This is useful if you always want to hear the delta or dry signal when moving the nodes around to know which frequencies your change affects.
Use dry signal with band listen
By default, Spiff will output the delta signal of a band’s frequency range when band listen mode is engaged. However, the dry signal will be passed through when this setting is enabled.
Display range of the reduction graph

Spiff offers three options for the reduction graph’s (in blue or red, depending on the mode) display range. This changes the range of visualizing the effective reduction between precise and large. Changing this setting sets the blue dB labels accordingly as shown in the figure on the right.
5.6. Version update checks

Spiff automatically checks for new plug-in versions in the background.
Updates are provided for good reasons, such as bug fixes and performance improvements. We always ensure that presets are backwards compatible for all Spiff versions to come. We take great care to procure that things don’t break between updates.
6. Paths for presets and uninstallation
6.1. macOS
User presets:
/Users/<username>/Documents/oeksound/spiff/Presets
Configuration file:
/Library/Application Support/oeksound/spiff/config.xml
The macOS uninstaller can be downloaded separately from our downloads page: https://oeksound.com/downloads/#uninstaller.
6.2. Windows
User presets:C:\Users\<username>\Documents\oeksound\spiff\Presets
Configuration file:C:\ProgramData\oeksound\spiff\config.xml
Please use the “Add or Remove Programs” -function (or similar) to uninstall Spiff.
FAQ and support
You can find our FAQ section on our website: https://oeksound.com/support
If our FAQ doesn’t answer your question, or if you find a bug, don’t hesitate to email us at: support@oeksound.com
Copyright and acknowledgments
Copyright oeksound Ltd 2021. All rights reserved. VST is a trademark and software of Steinberg Media Technologies GmbH. VST PlugIn Technology by Steinberg Media Technologies
 VST is a trademark and software of Steinberg Media Technologies GmbH.